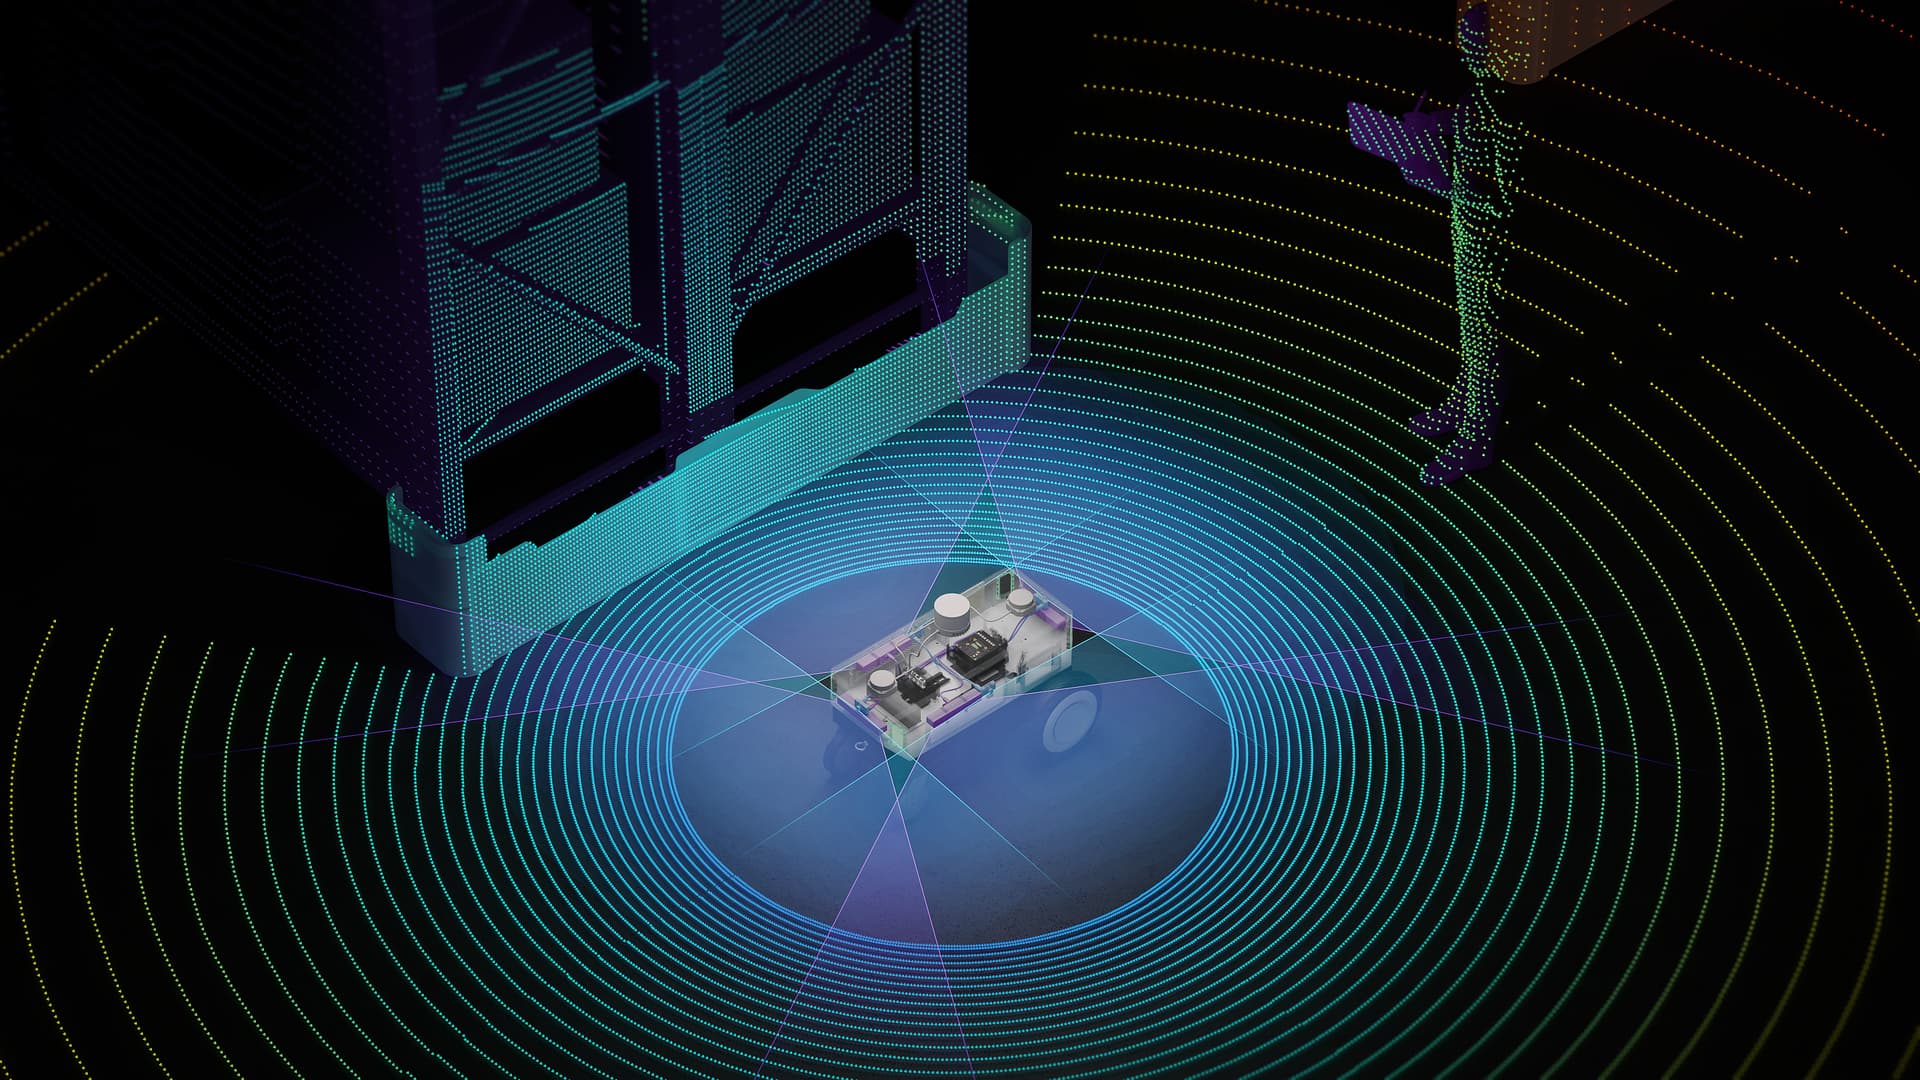
In this review on the Seeed Studio reComputer J1020, a robust box with an NVIDIA Jetson Nano with a custom carrier with extra RTC socket, M.2 KEY E and M.2 KEY M connector extra.
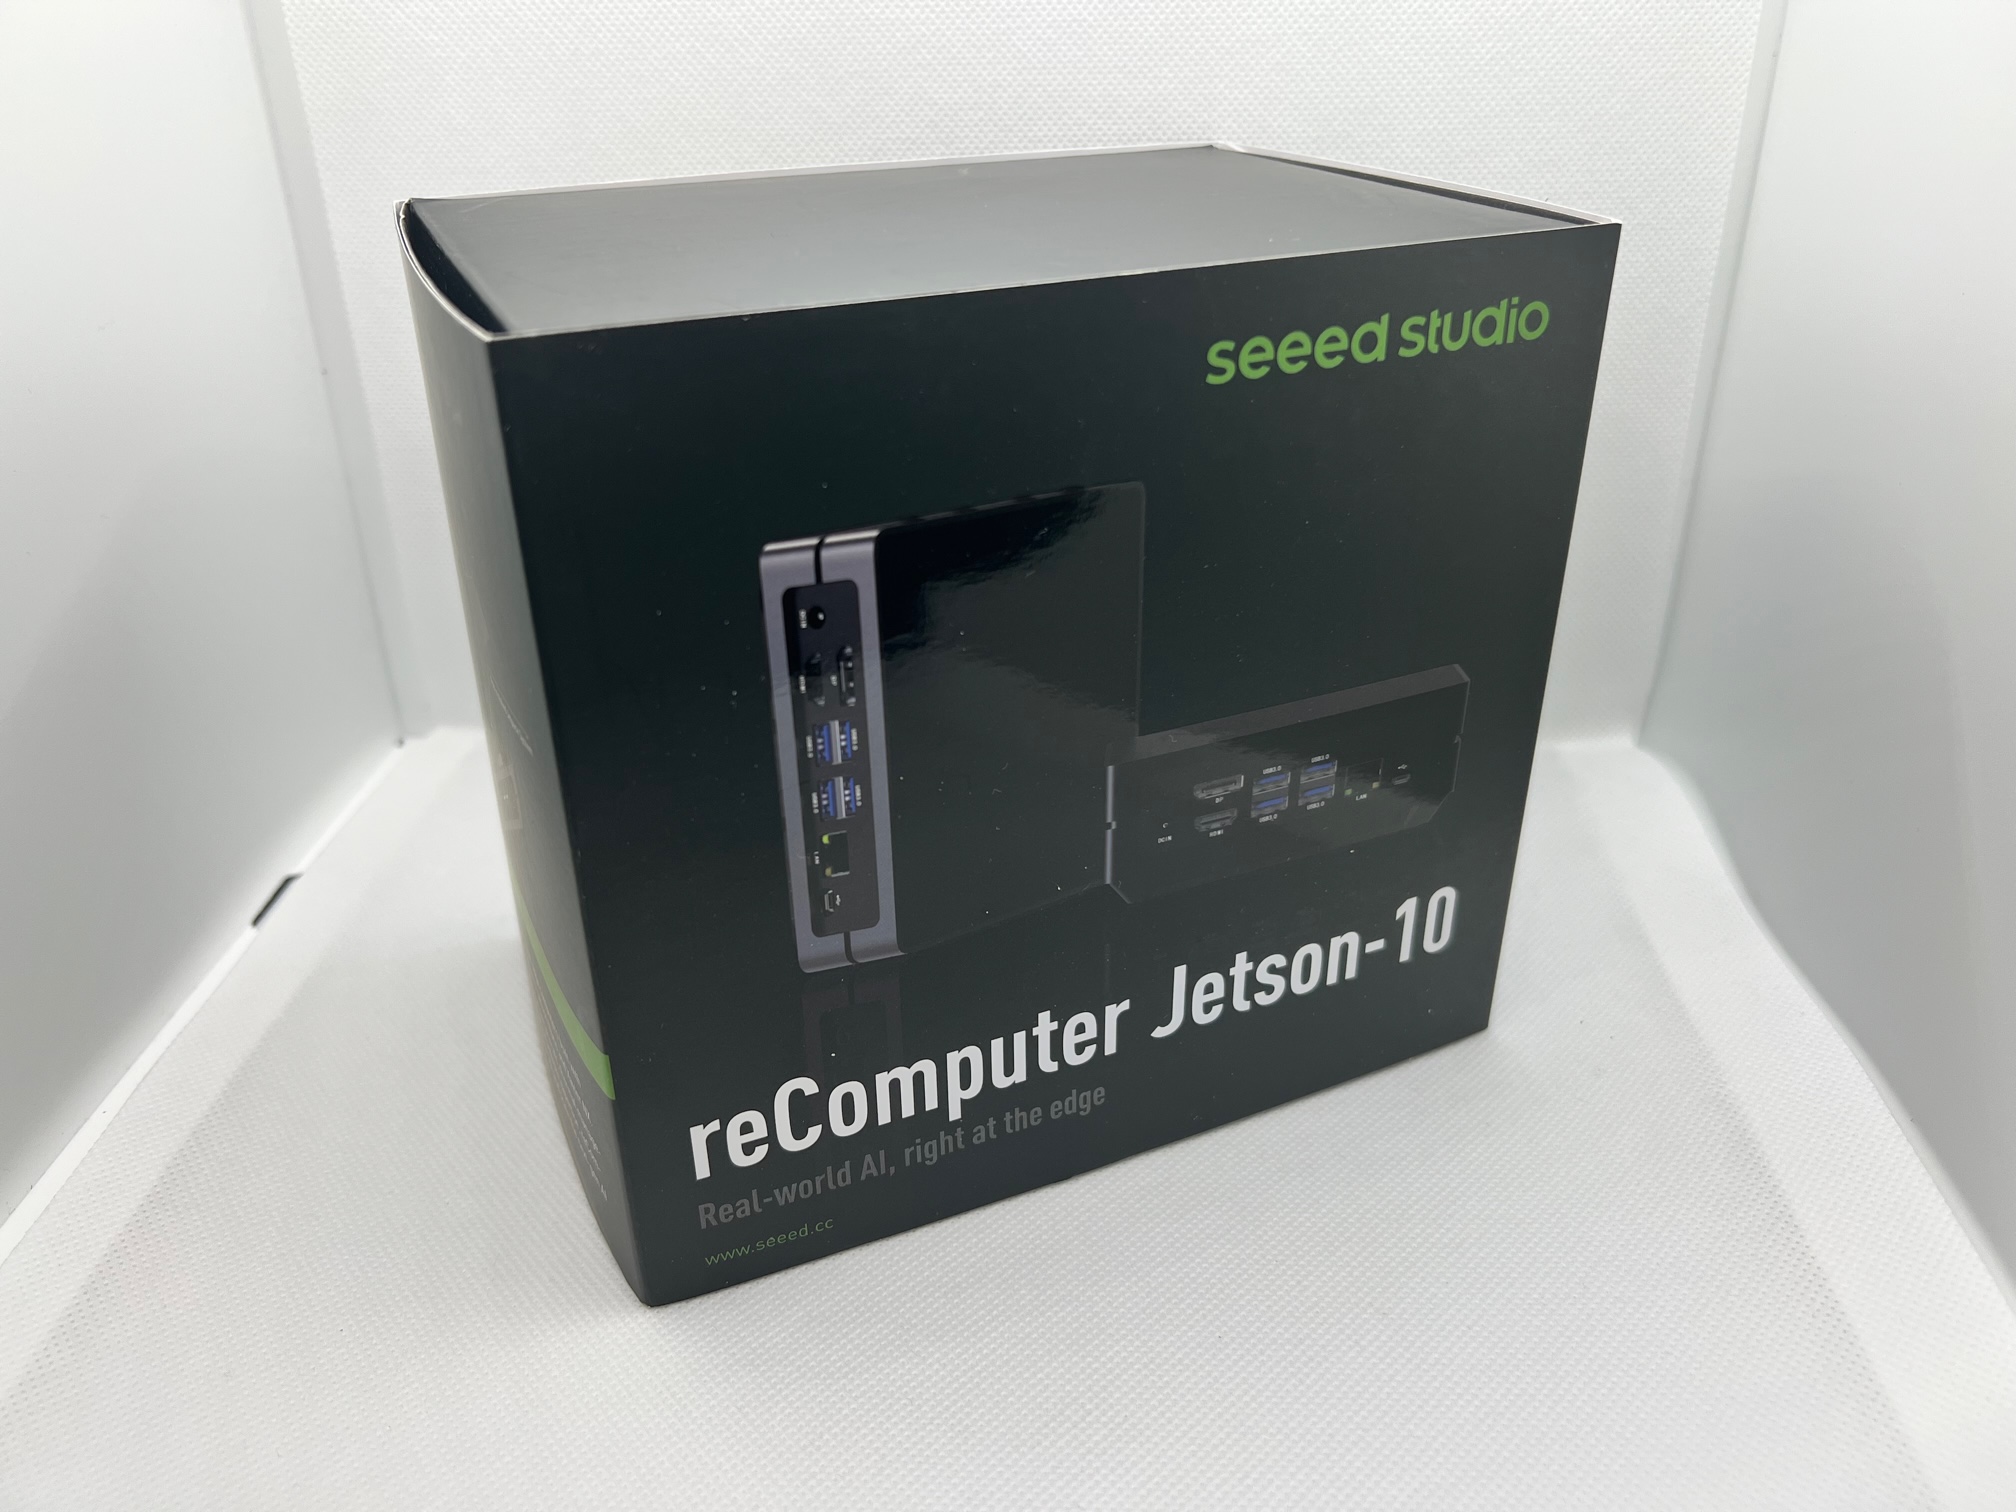
![]() WARNING reComputer Jetson-10-1-A0 has changed to reComputer J1010
WARNING reComputer Jetson-10-1-A0 has changed to reComputer J1010
Seeed Studio also sells different solutions of the same reComputer J10 series:
Product overview
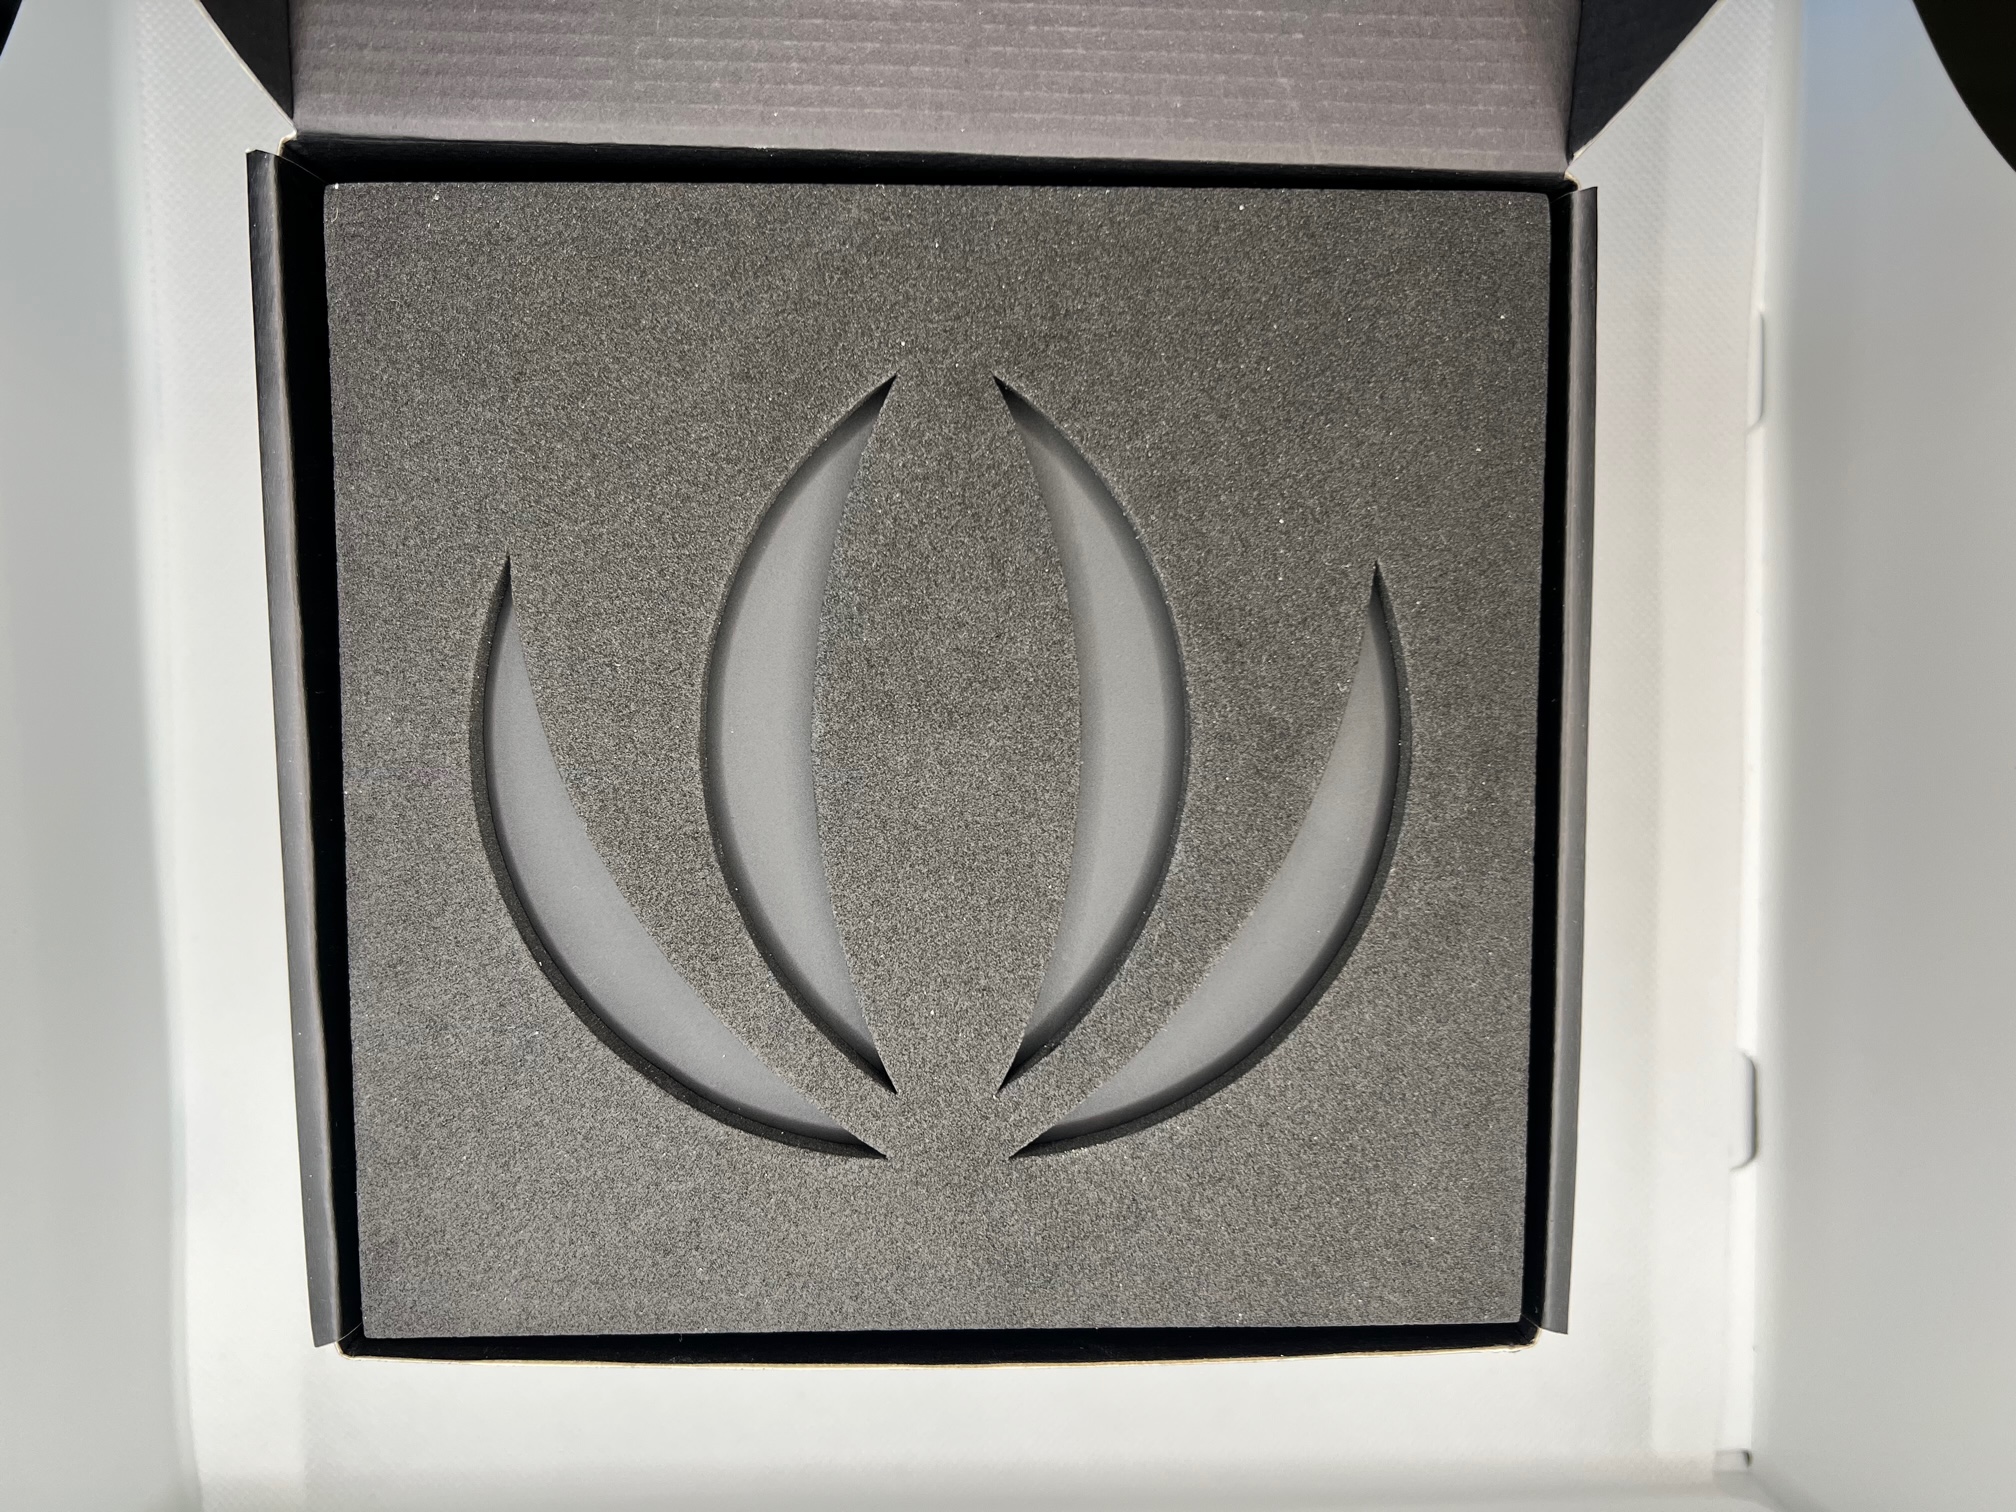
The Seeed Studio reComputer J1020 appears in a nice black carton package where the Aluminum case is cushioned by foam.
The package includes a box with the 12V power adapter and a complete set of power adapters to use the reComputer in all countries.
List of components:
- NVIDIA Jetson Nano module
- Seeed reference carrier board
- Passive aluminum heatsink
- Aluminum case
- 12V power adapter
This box looks pretty nice and safe for transport. I liked the engraved logo when you opened the package.
ℹ️ INFO If you want to see a review of the unboxing, open my 📸 robo.panther instagram account and watch my 🎞️ reel
Main features
- Hand-size edge AI device built with NVIDIA Jetson Nano 4GB Production Module, with onboard rich IOs including Gigabit Ethernet port, USB 3.0 & USB 2.0 ports, HDMI port, and SD card slot.
- 128 NVIDIA CUDA® cores deliver 0.5 TFLOPs (FP16) to run AI frameworks and models for applications like image classification, object detection, segmentation, and speech processing.
- Pre-installed NVIDIA JetPack: support the entire Jetson software stack and various developer tools for building fast and robust AI application provided by Seeed Edge AI partners, helps develop innovative AI solution for manufacturing, logistics, retail, service, agriculture, smart city, healthcare, and life sciences, etc
- Incredibly power efficient: powered by Type C 5V/3A, consuming as little as 5 watts.
- Expandable with the onboard interfaces and reComputer case, able to mount on the wall with mounting holes on the back.
reComputer J1020
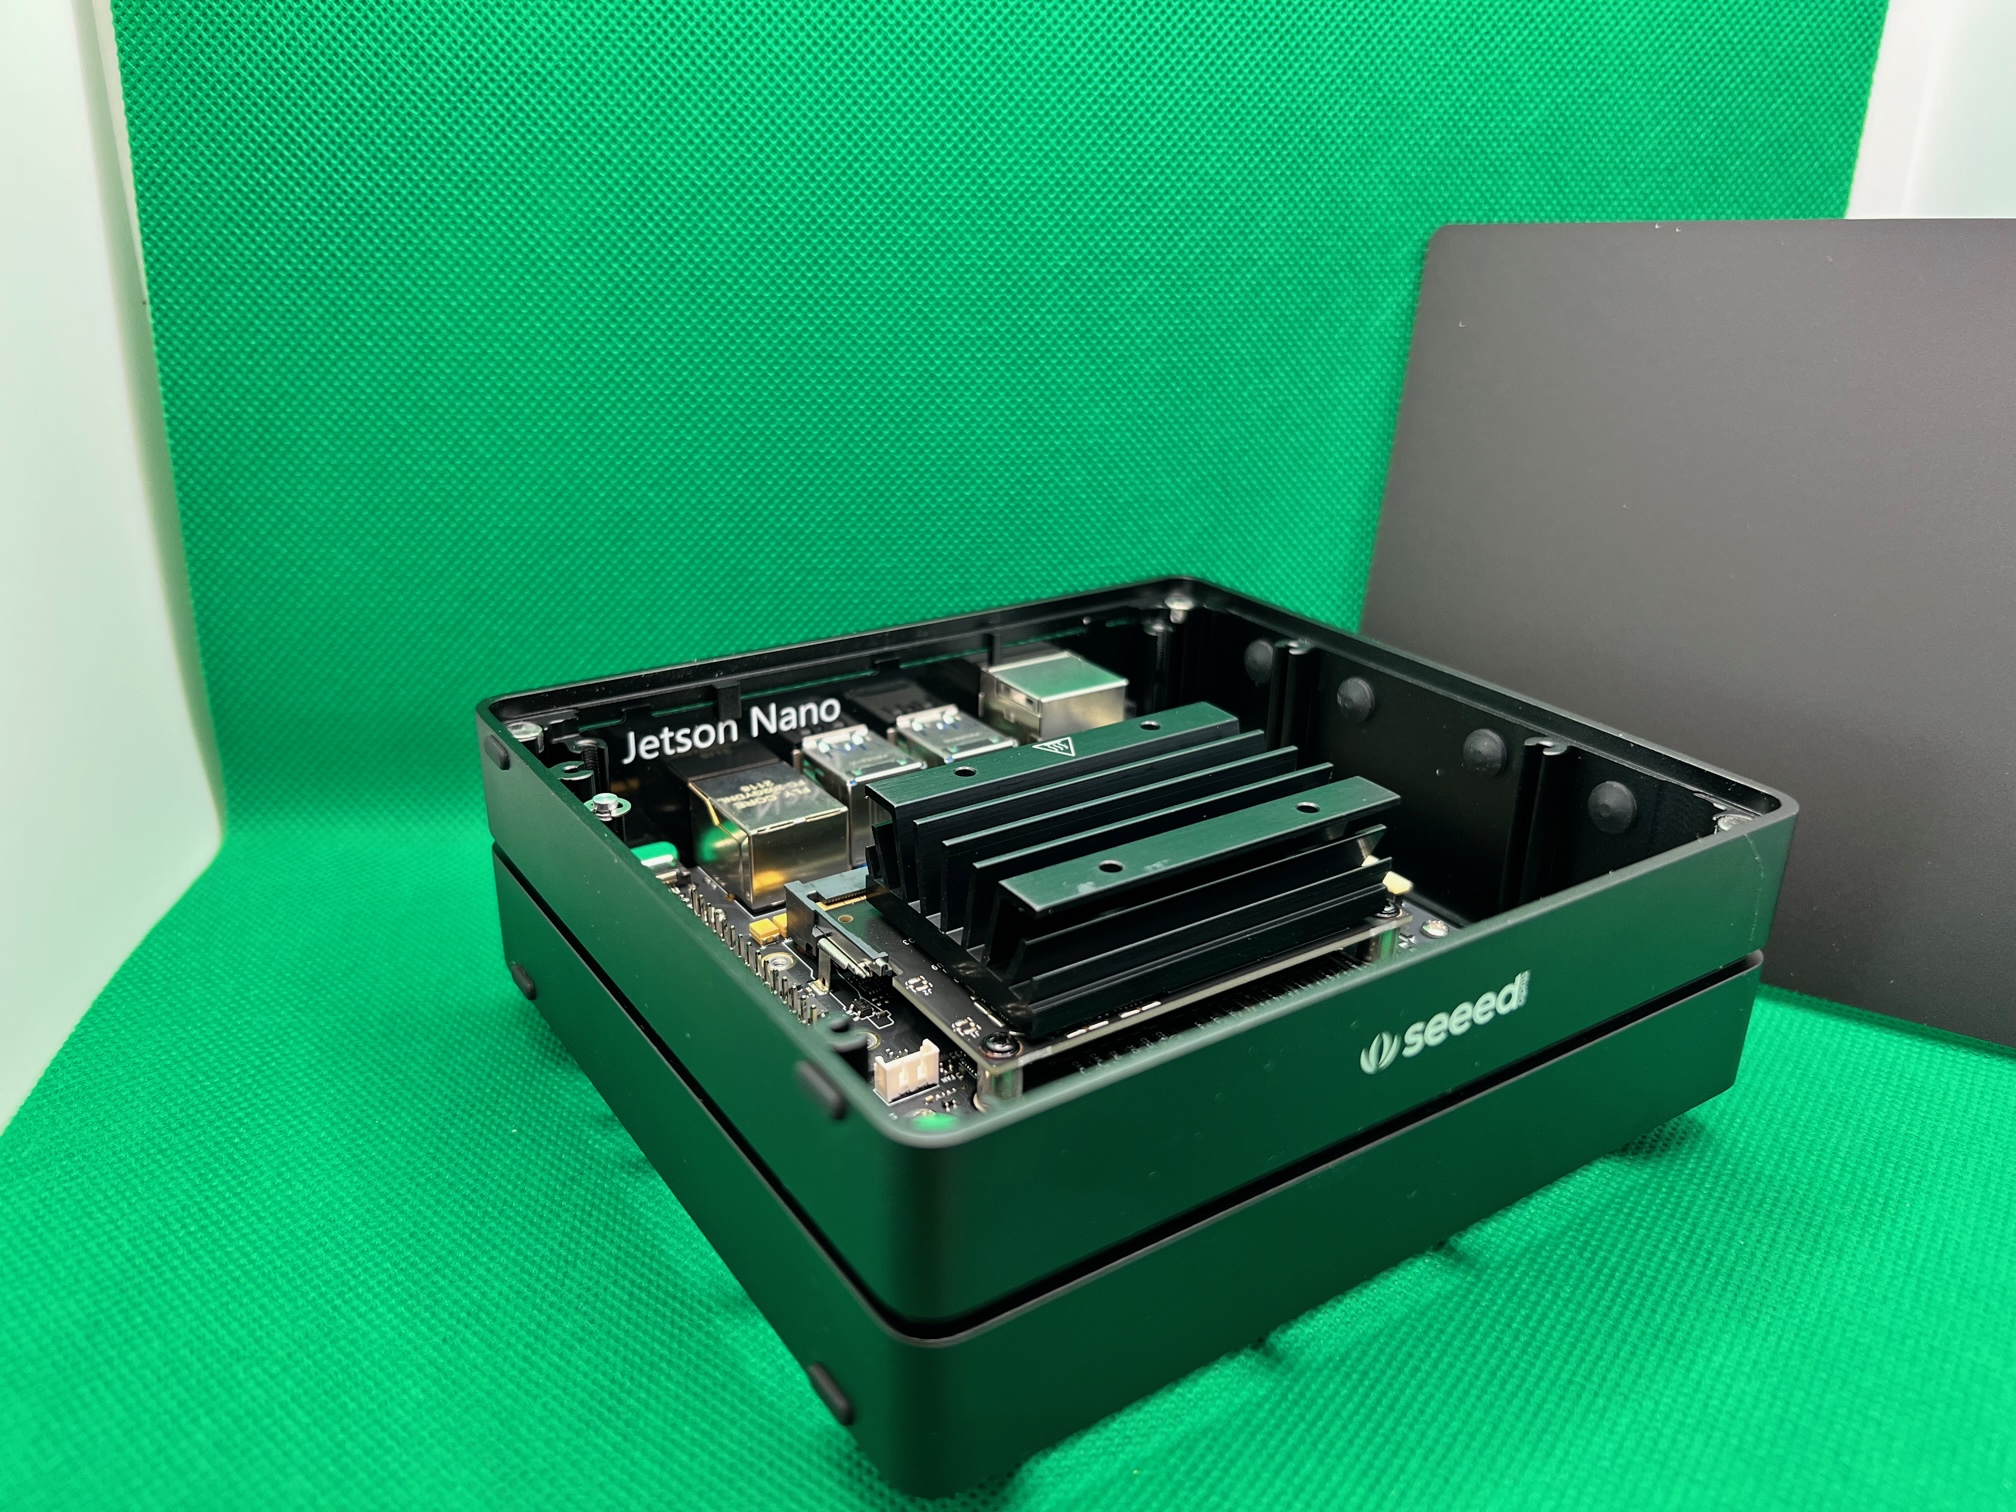
The box looks pretty solid and well-designed. Inside the Aluminum case are assembled on the Seeed Studio custom developer board the NVIDIA Jetson Nano module with heatsink, same of the official NVIDIA Developer Kit.
In the second box is available a 12V power supply with all adapters, for all main countries, such as:
| Plug | Countries |
|---|---|
| Type-A | USA, Japan, Canada, Mexico |
| Type-C | Europe, Asia and South America |
| Type-E | Europe |
| Type-G | UK |
| Type-I | India |
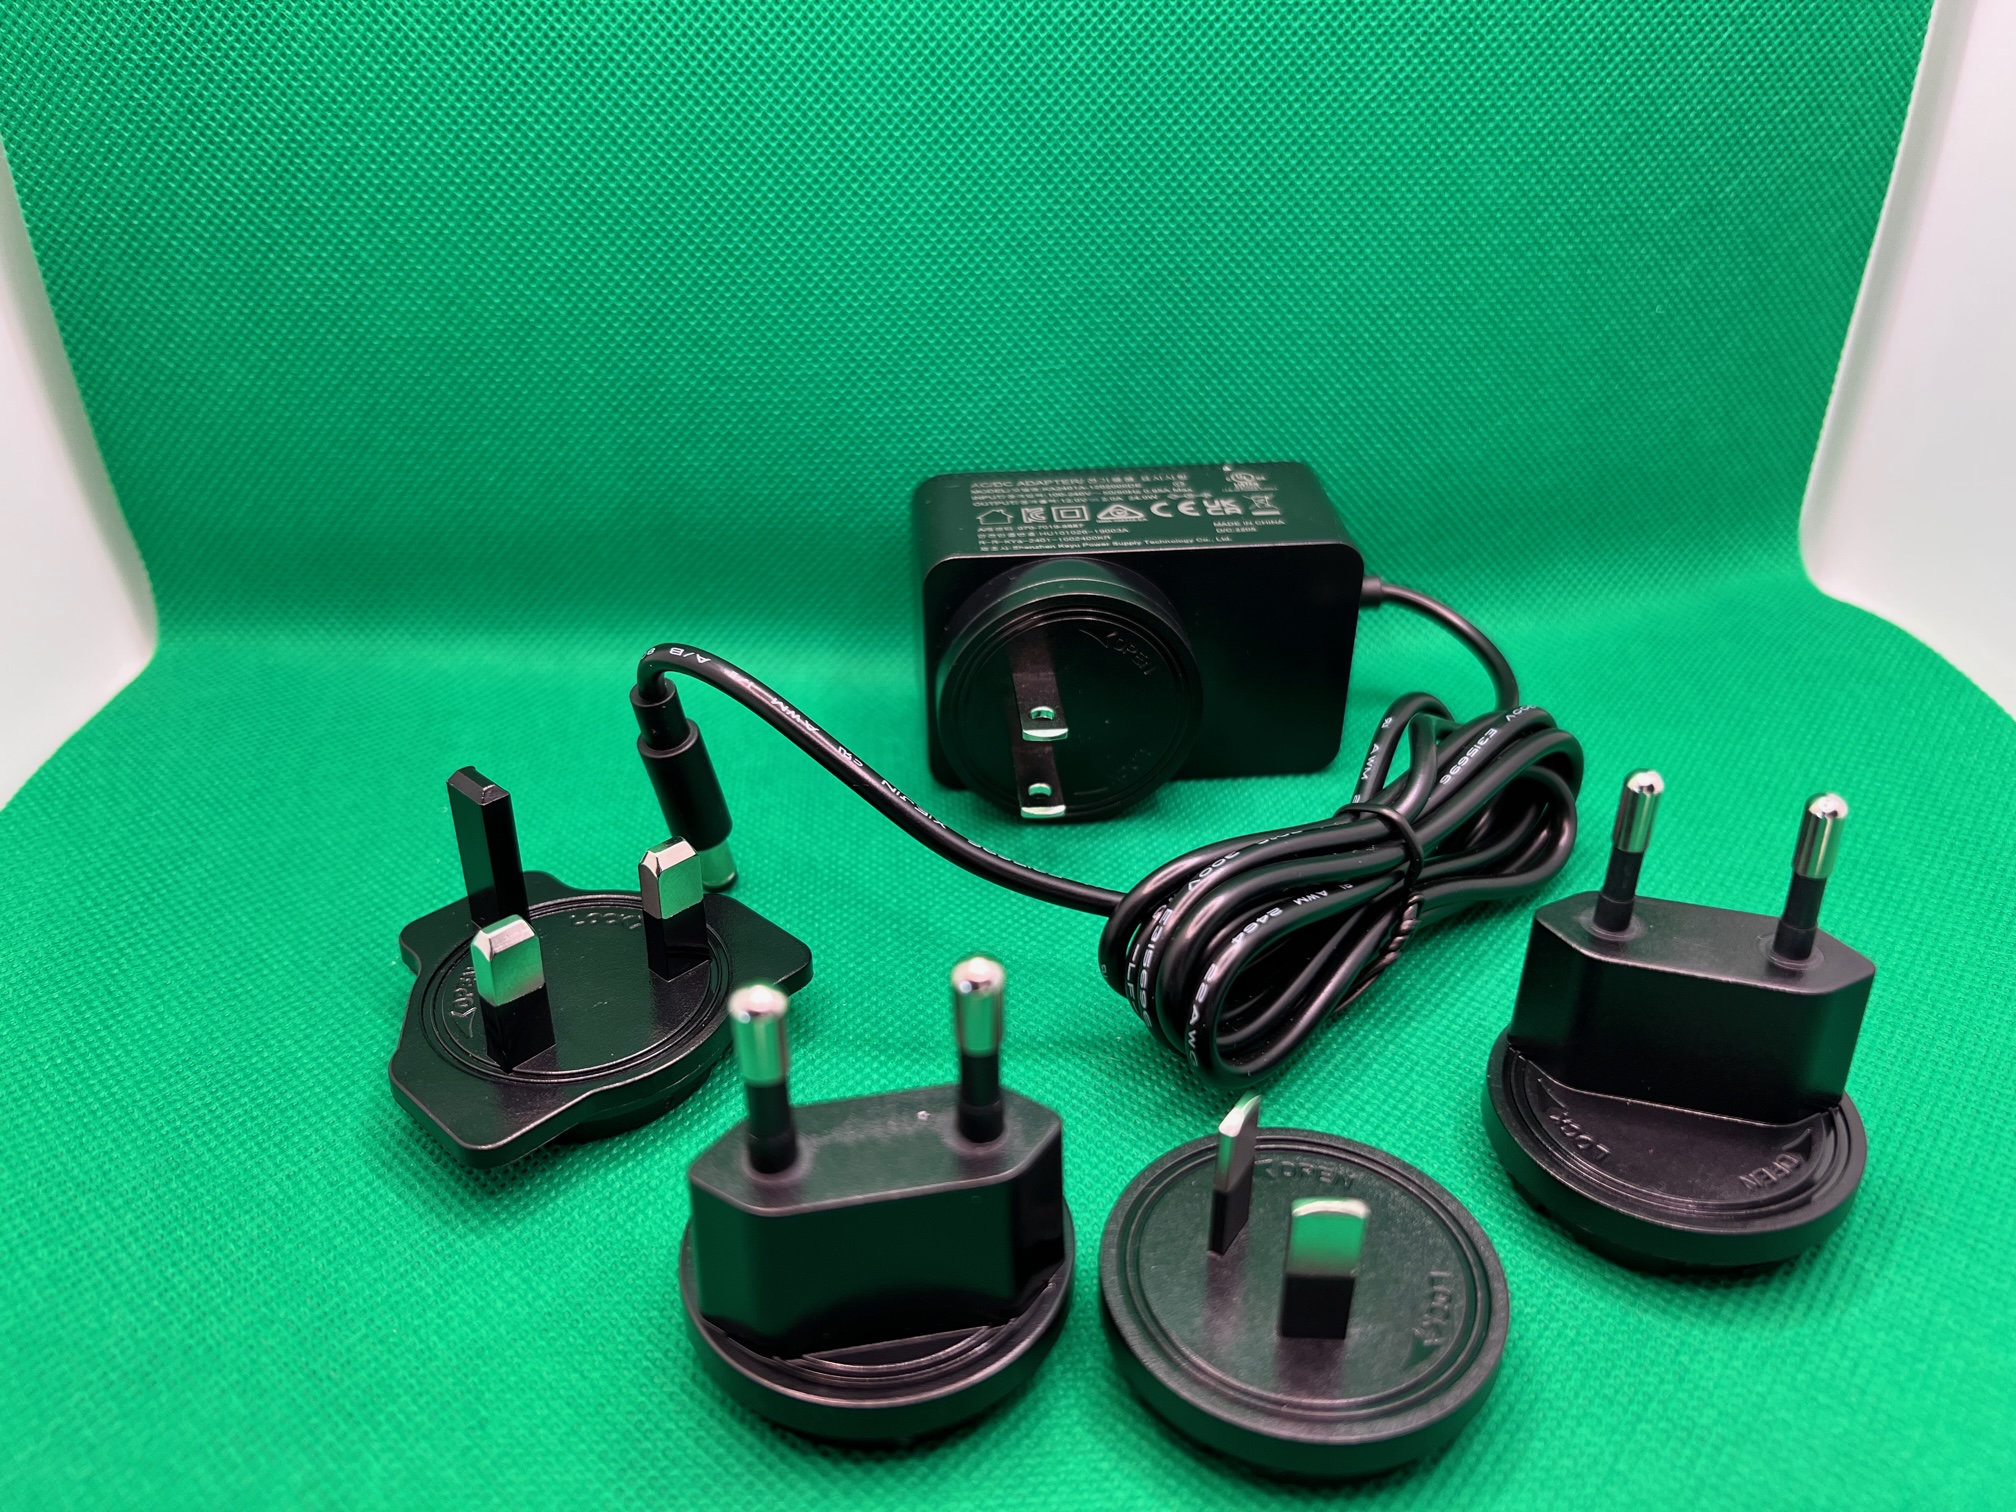
This power supply works with a 100-240V input with an output of 12V at 2A continuous. This power AC/DC adapter has a power jack output that fits with the NVIDIA Jetson Nano custom carrier board.
Aluminum case
The Aluminum case is pretty solid and straightforward to use a Jetson Nano for server application or AI.
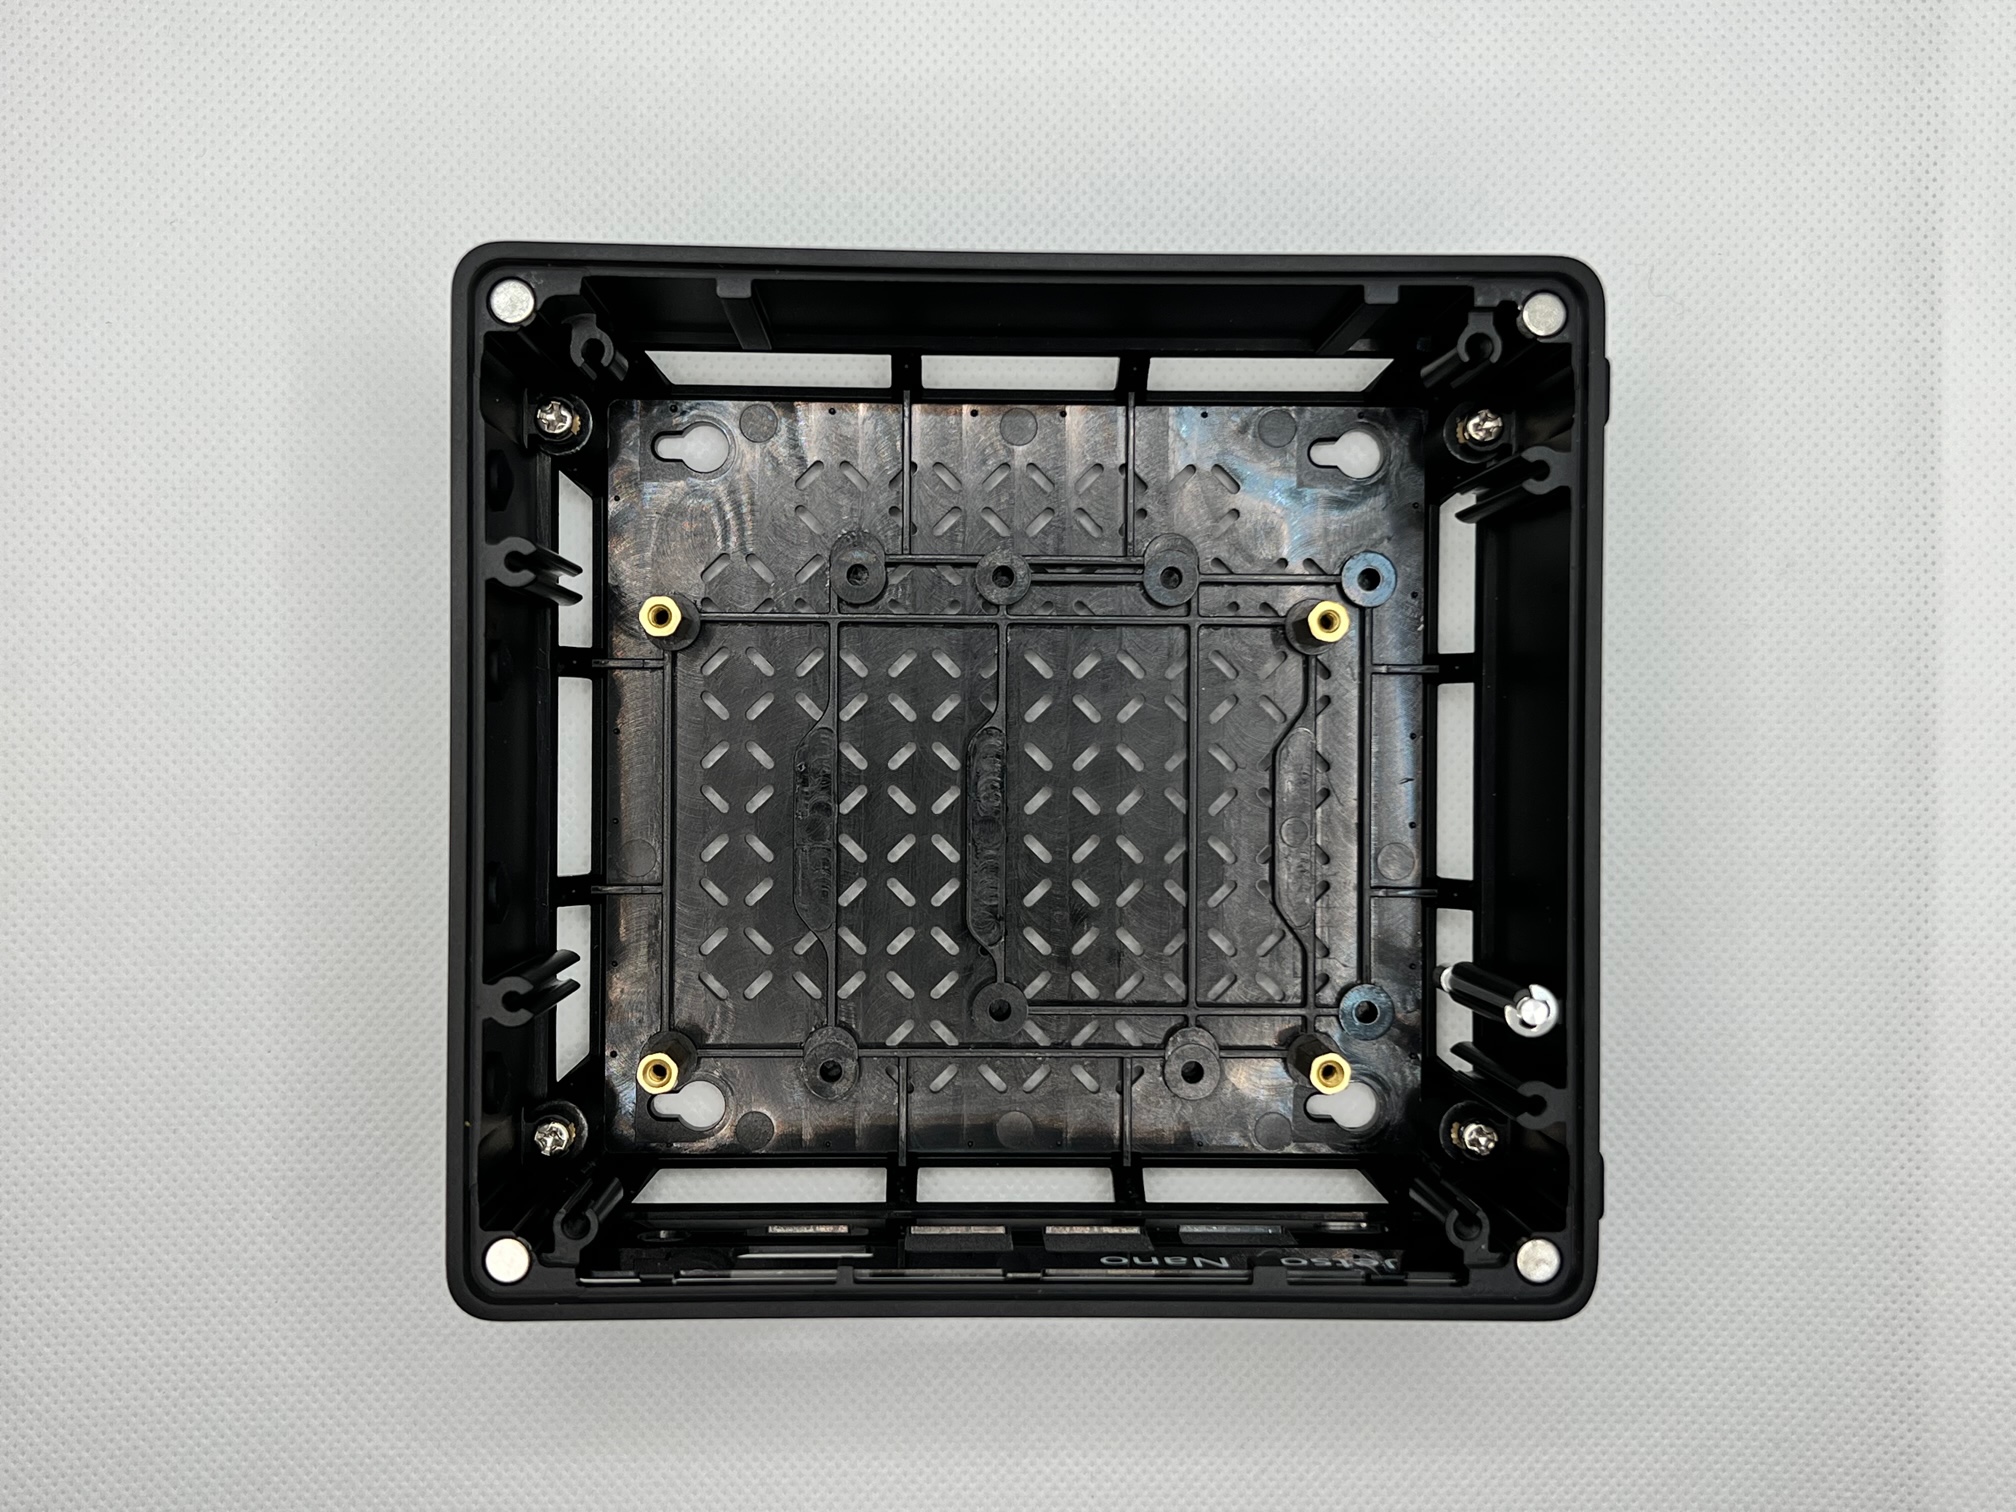
Something that I notice is beneficial is the double rubber feet, one the case basement and another side on a side. This solution gives this NVIDIA Jetson box a stable solution if you don’t have enough space on your desk. Moreover, there are four holes for a wall mount.
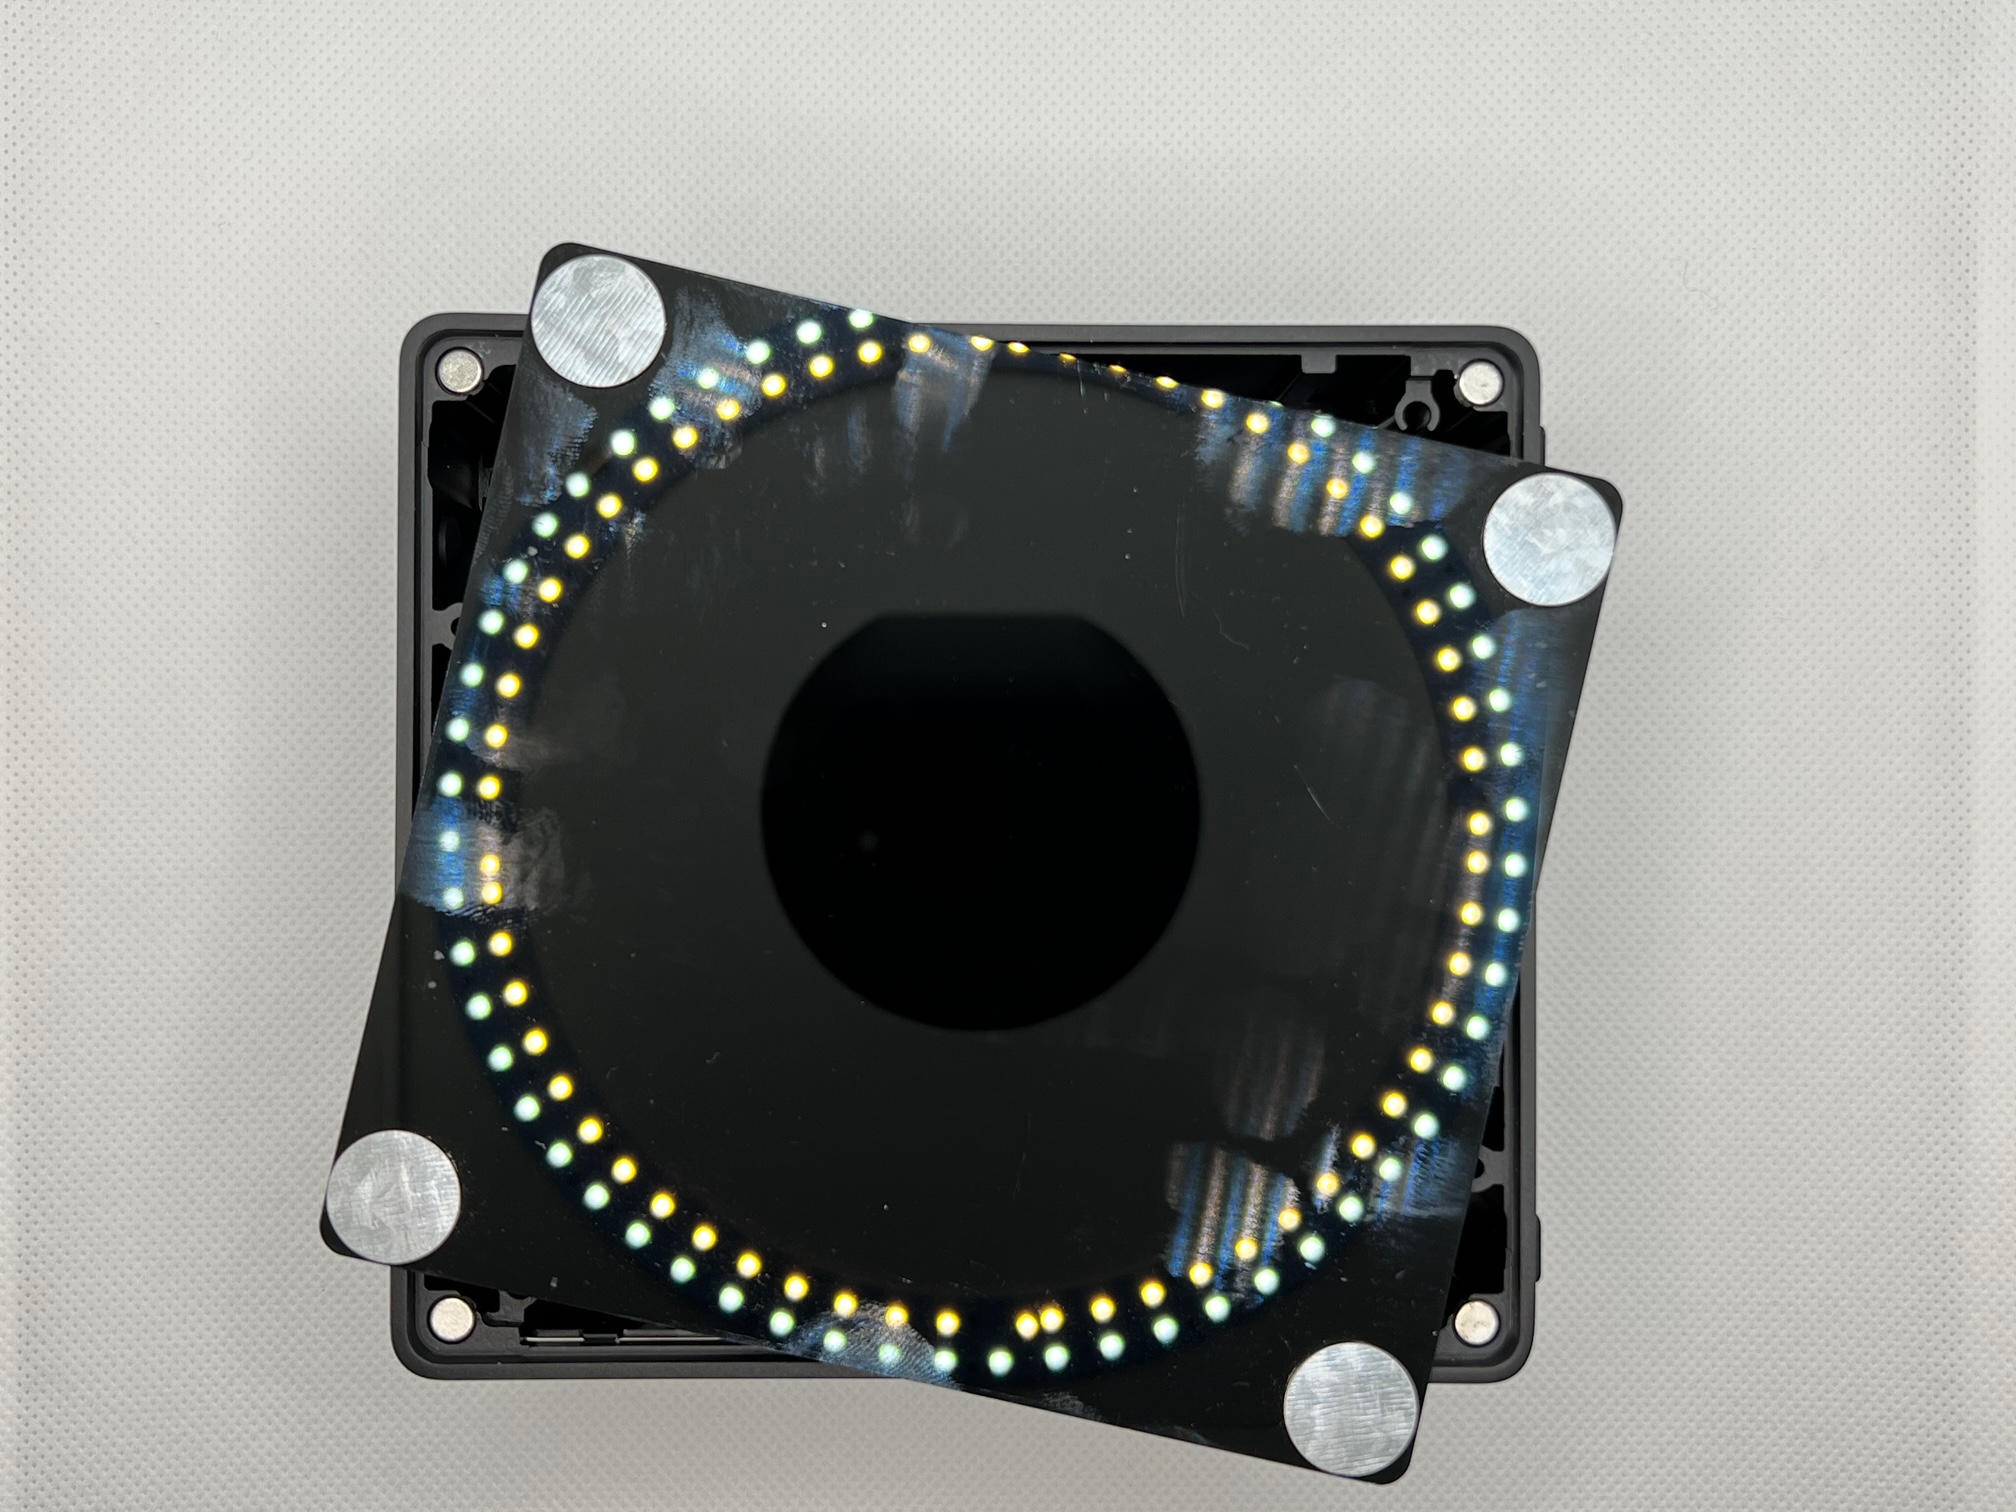
Another nice thing is a button below the box to open and access the NVIDIA Jetson. Four magnets attach to the cover and are released only by pressing this button.

In the two pictures below, you can notice how the reComputer case is made.
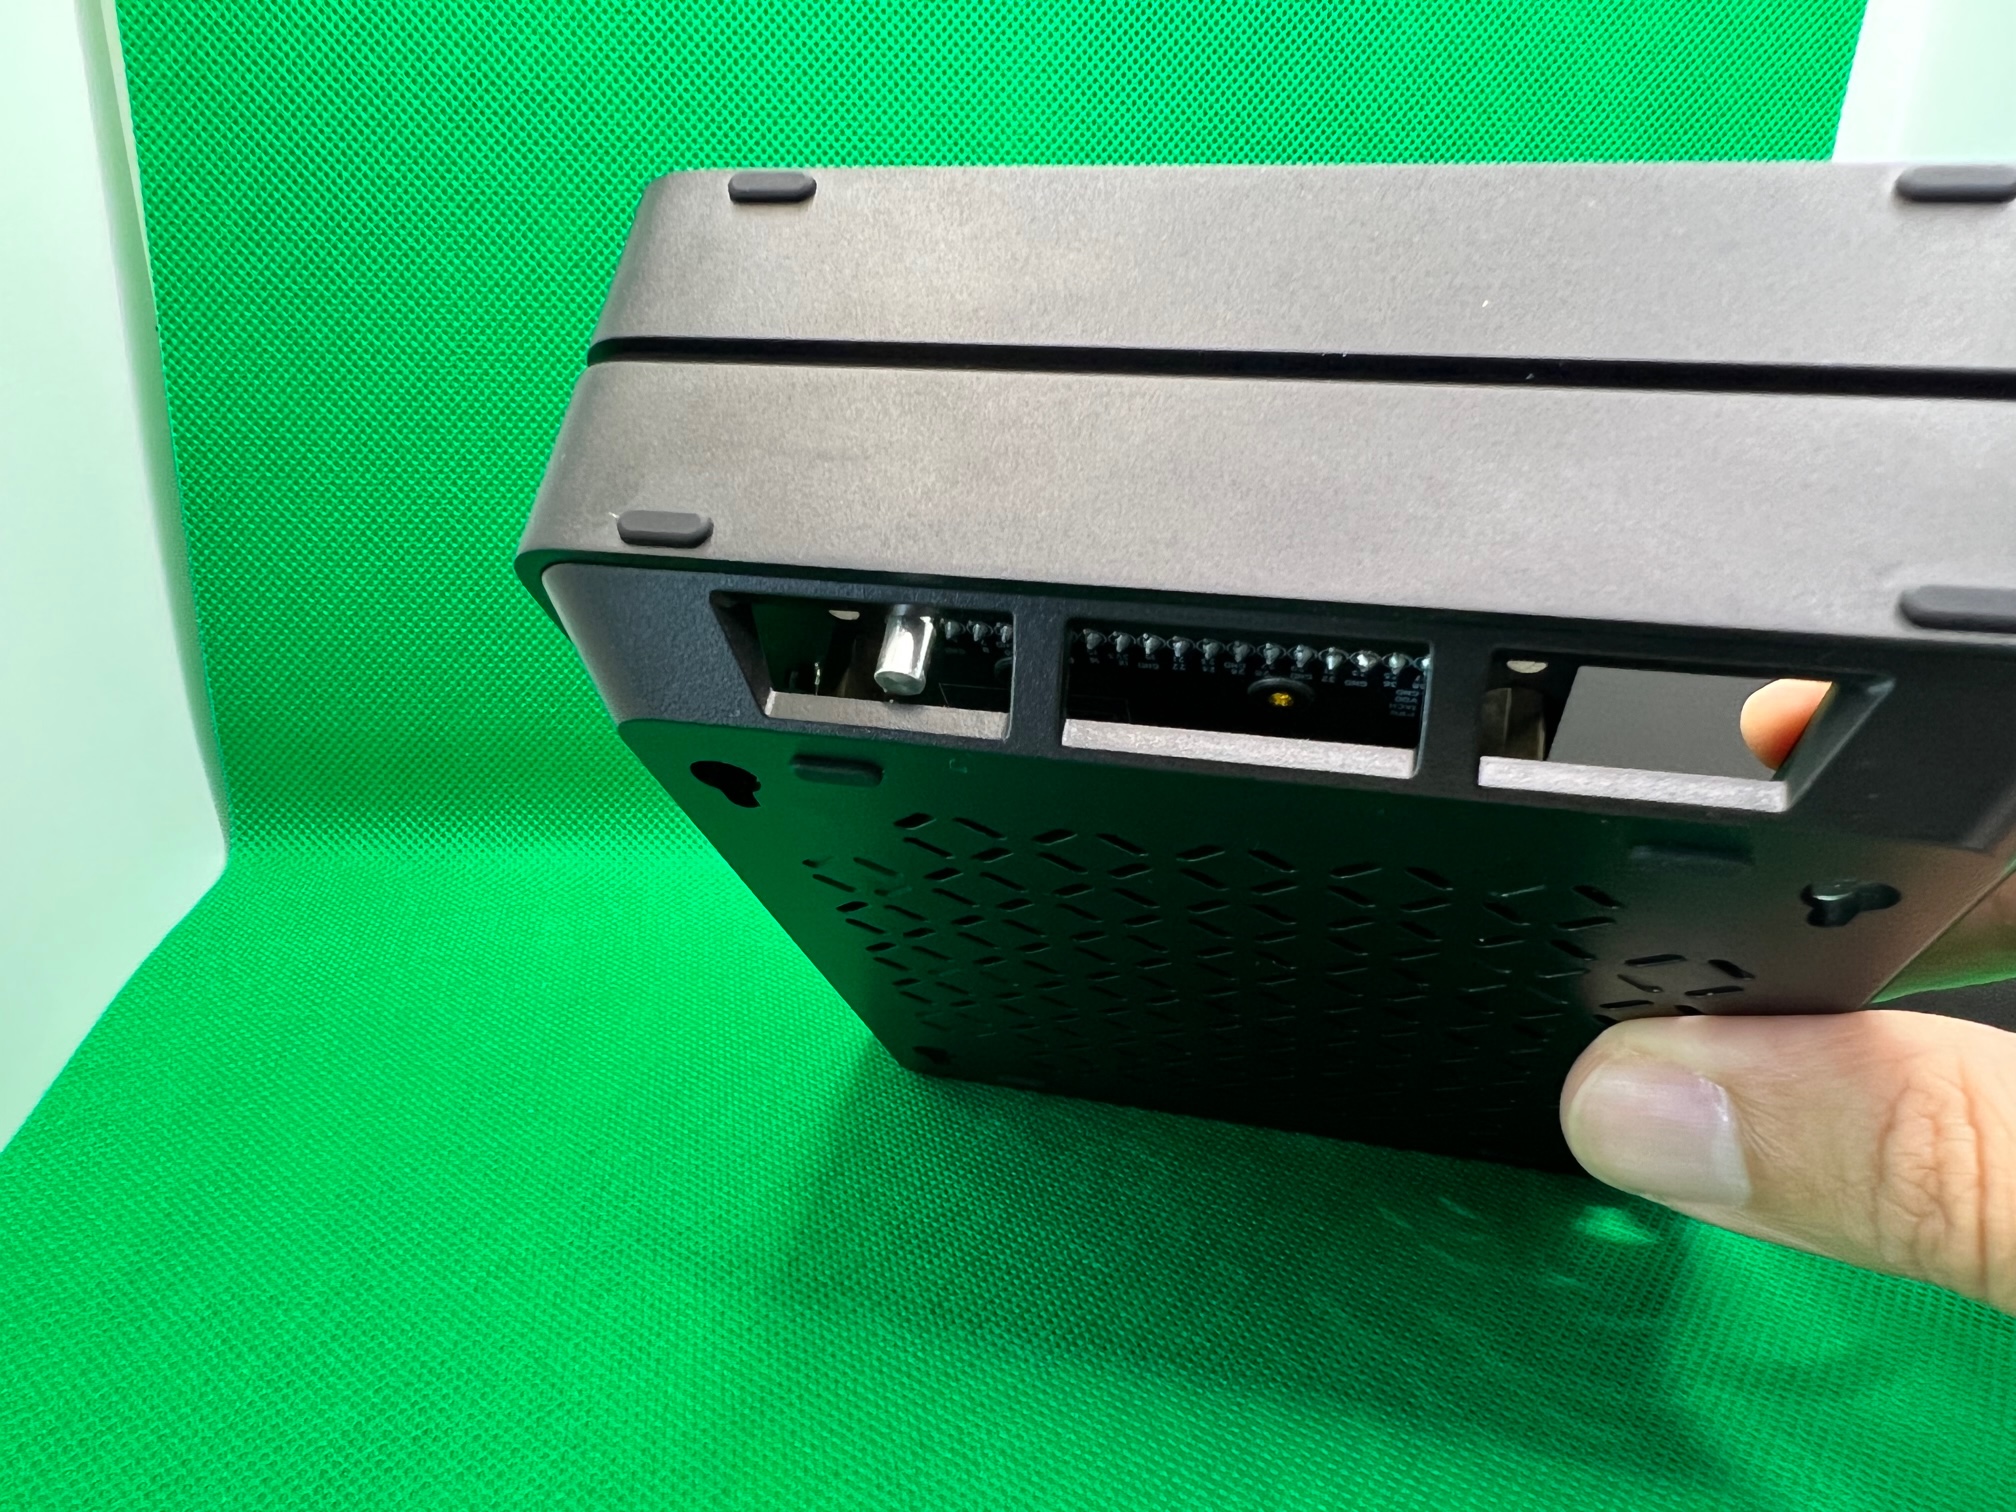
There are different threaded holes for different carrier boards or devices. This is a good solution if you want to use this case for other carrier boards or if you want to design something from scratch.
This case offers on the other side of rubber feet four through holes to pass cables from the NVIDIA Jetson outside the case. For example, if you have buttons, I2C sensors, or others.
I suggest that NVIDIA Jetson Nano not use the cover and make it possible to plug an extra fan on the Jetson heatsink.
This aluminum case is also fit for an NVIDIA Jetson Xavier NX board. In this case, you don’t need to modify anything; the heatsink already has a little fan.
Carrier board
The Seeed Studio reComputer J1020 offers an excellent custom carrier well design. In addition, it looks like to have on your hands an official NVIDIA Jetson Nano Developer kit.
ℹ️ INFO Have you seen my review on the NVIDIA Jetson Nano?
Check the links below:
The size and the screw holes are in the same position as the official NVIDIA Jetson Nano Dev Kit.
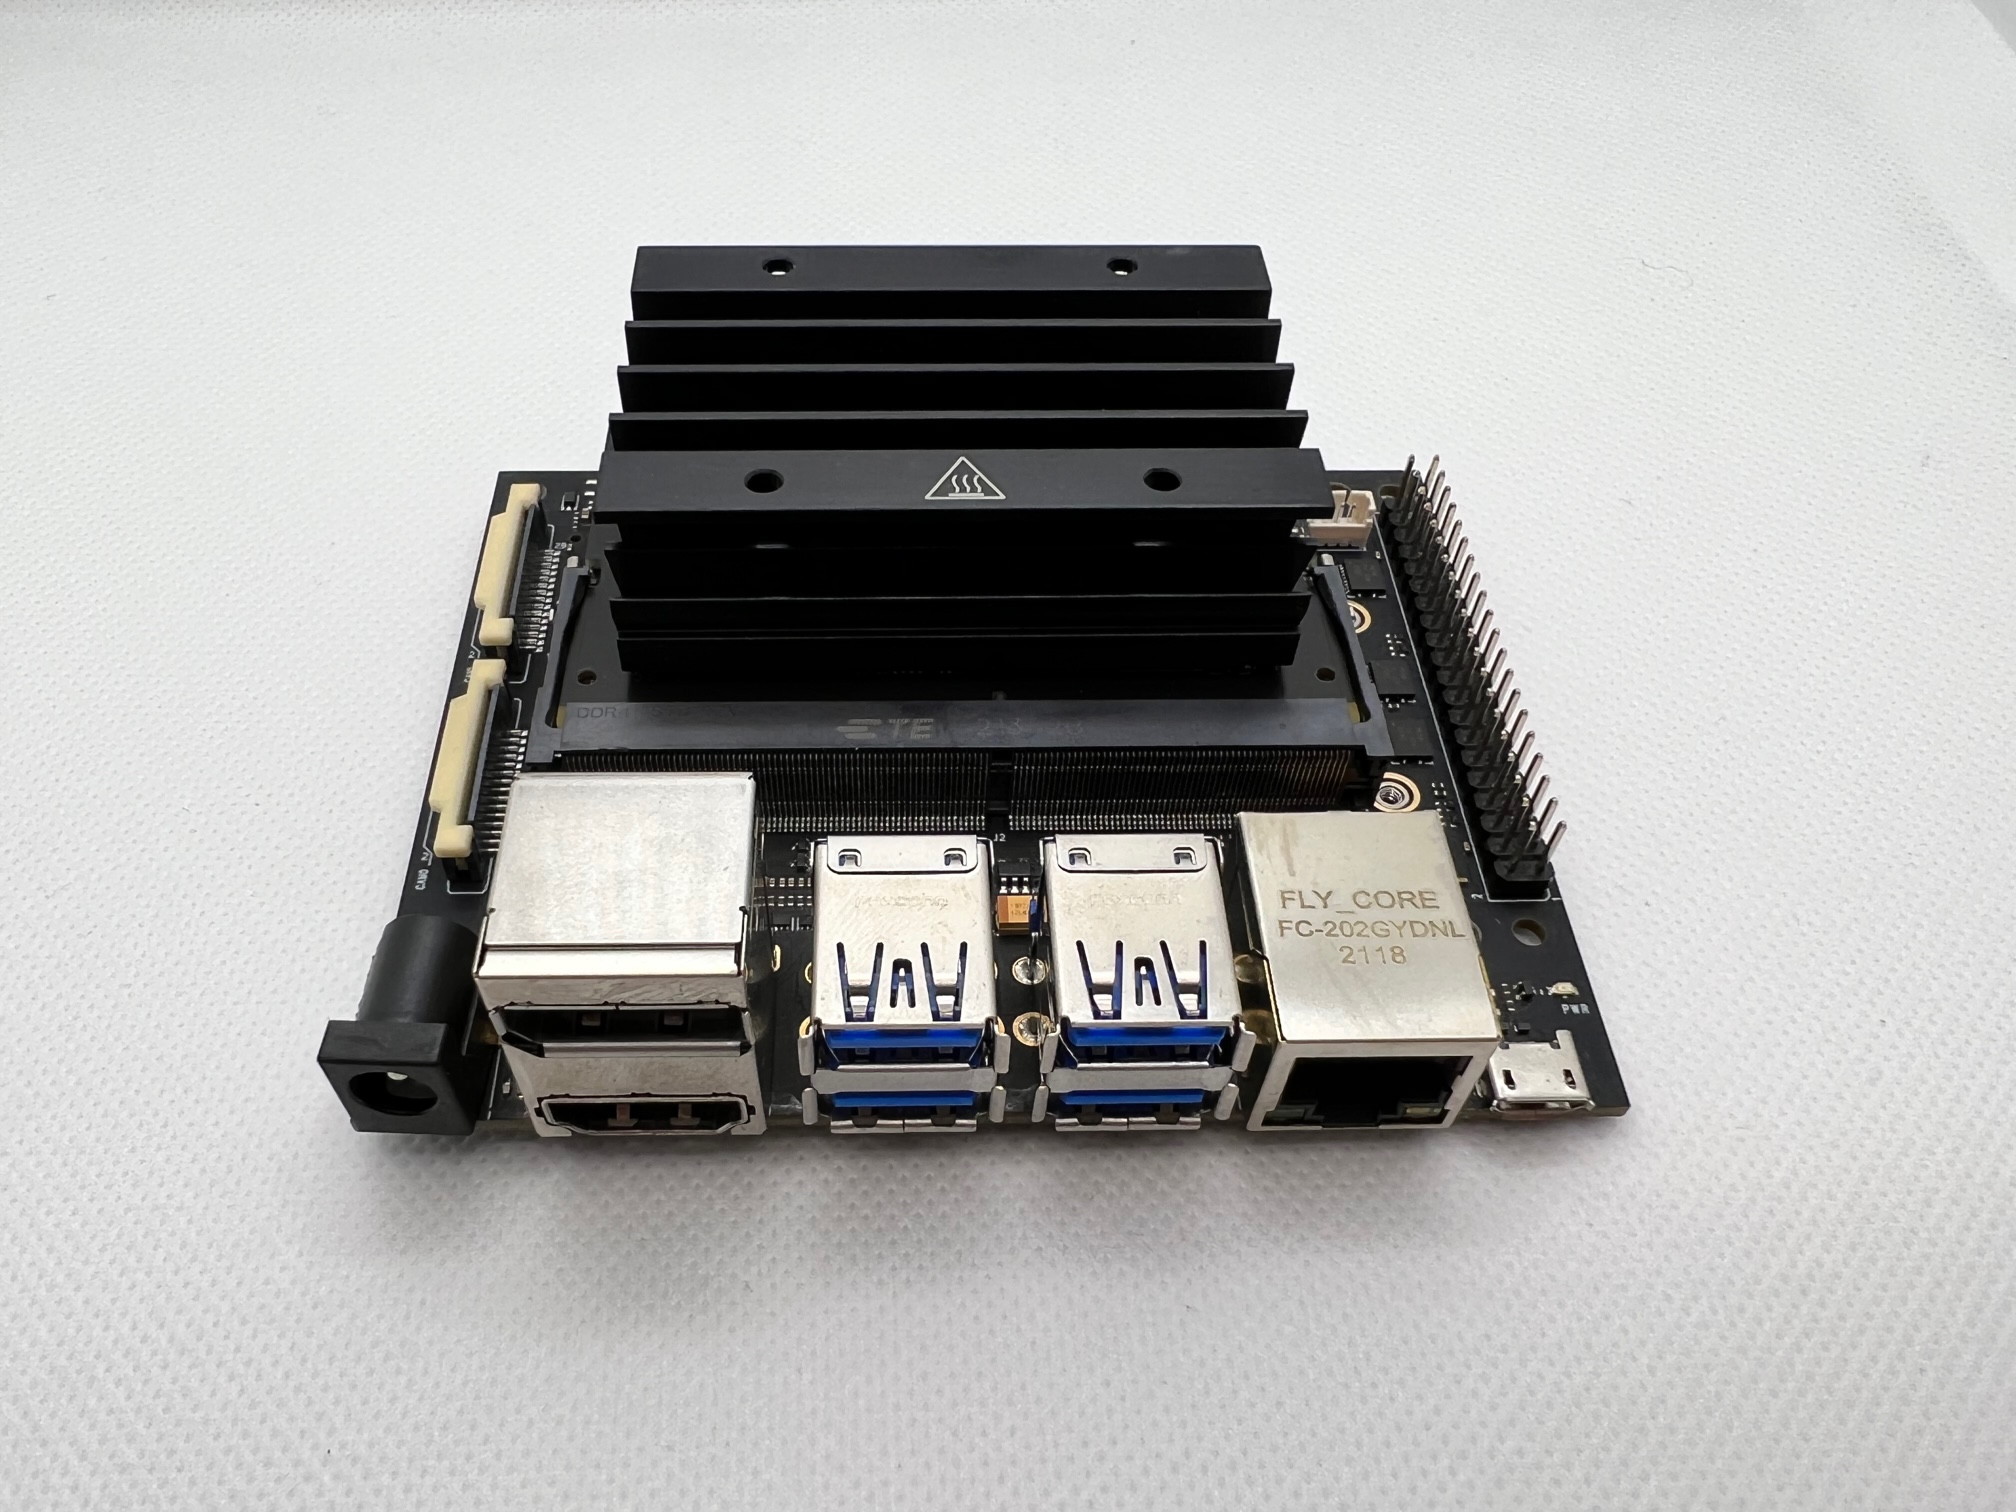
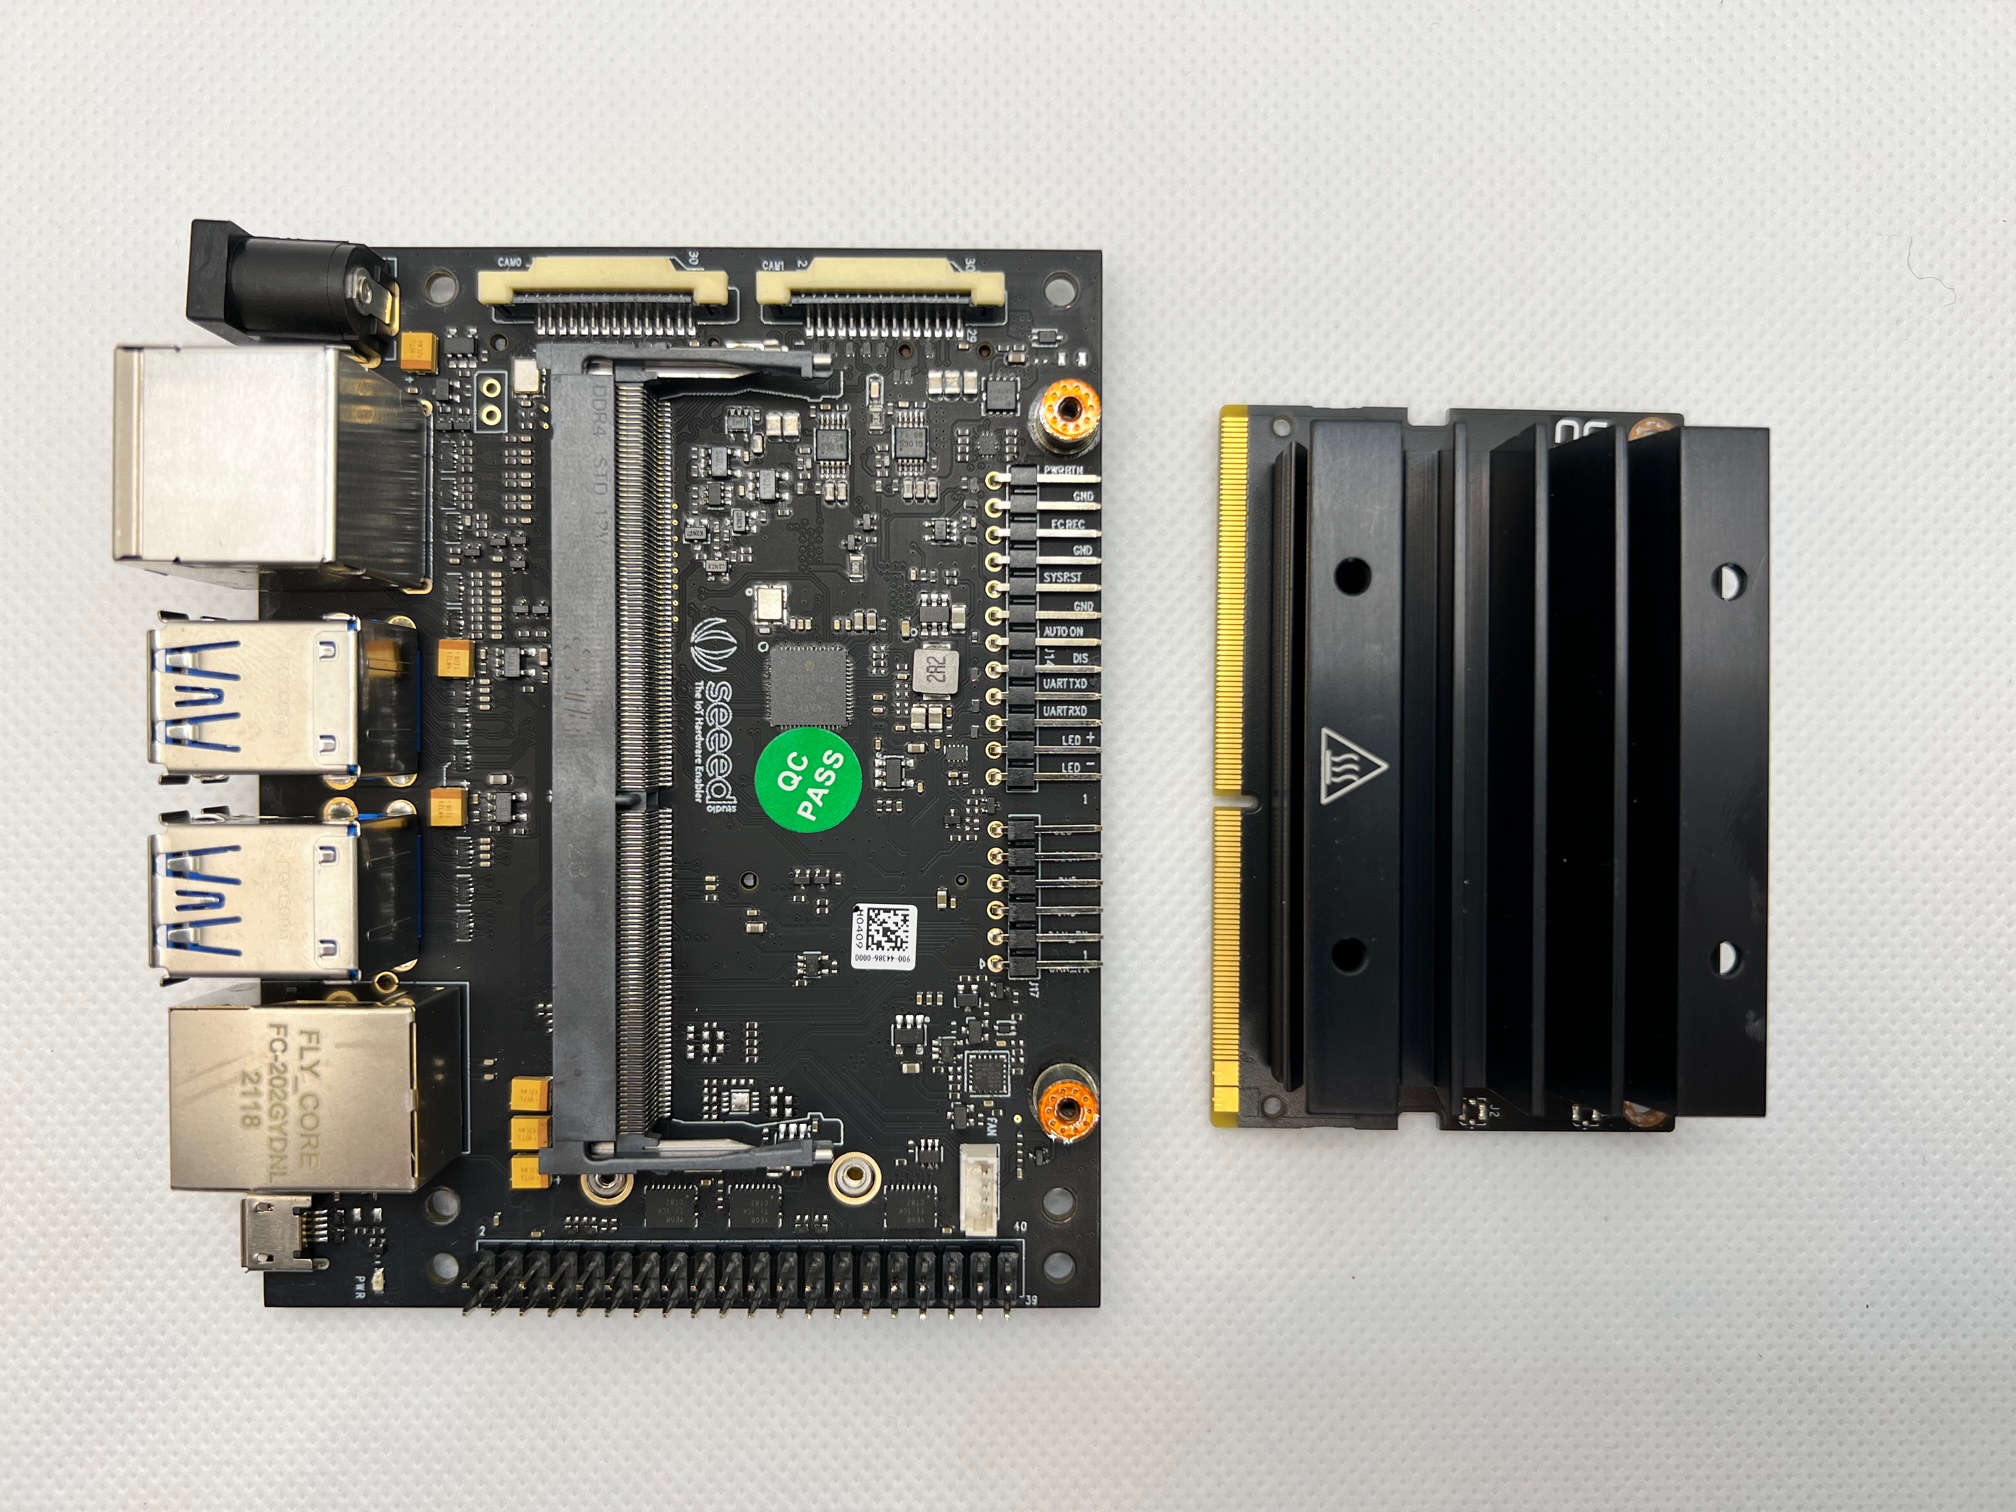
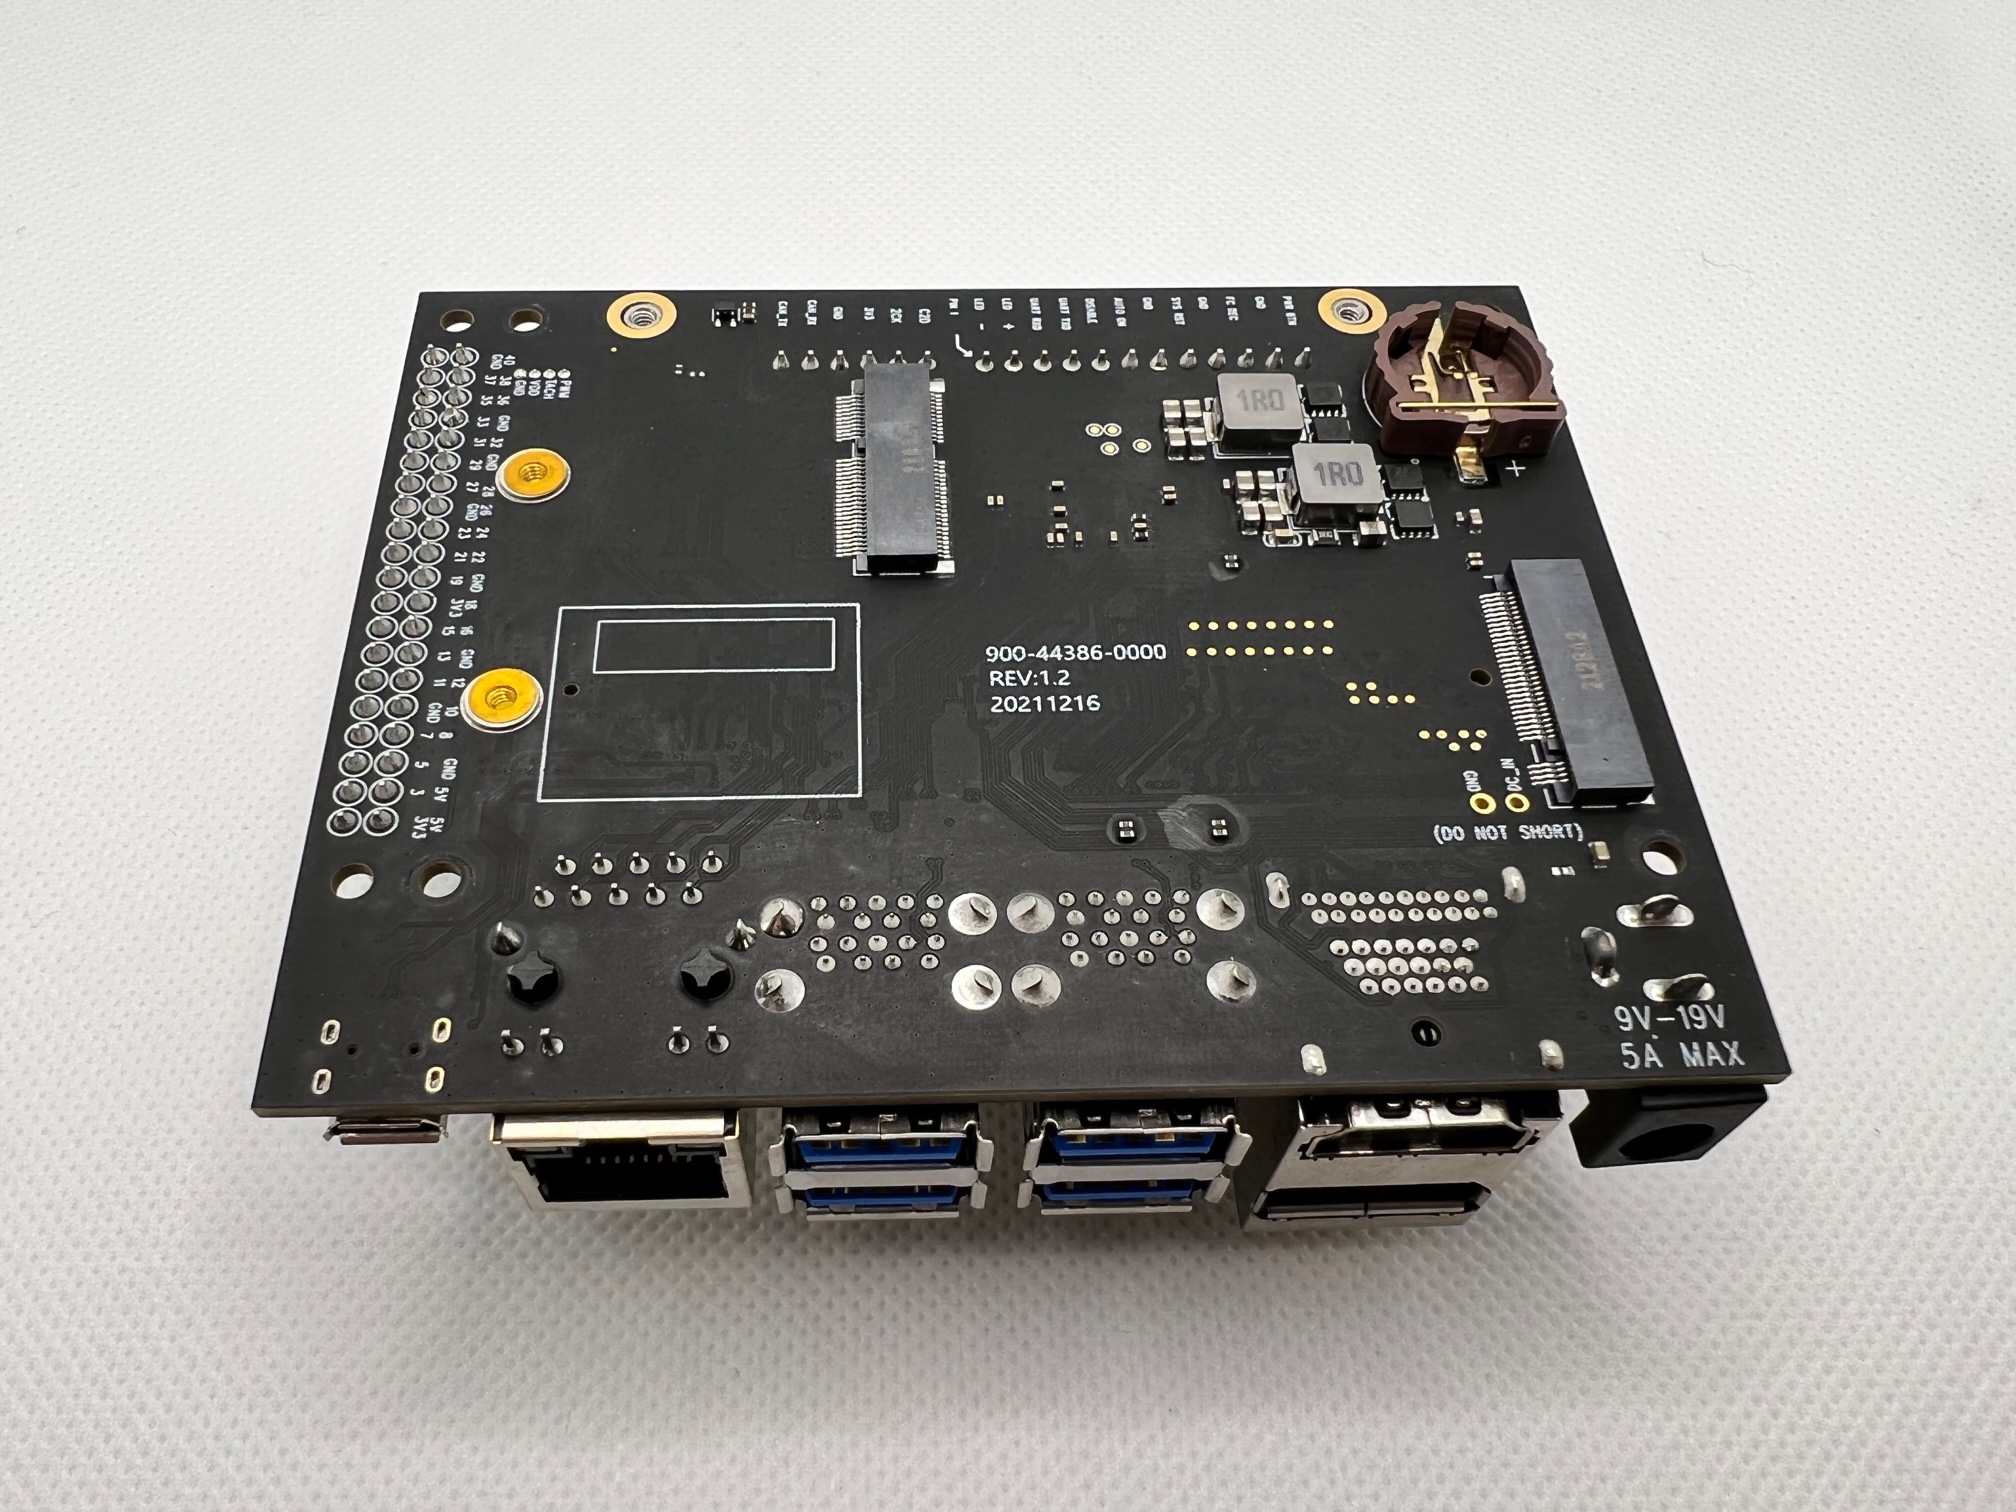
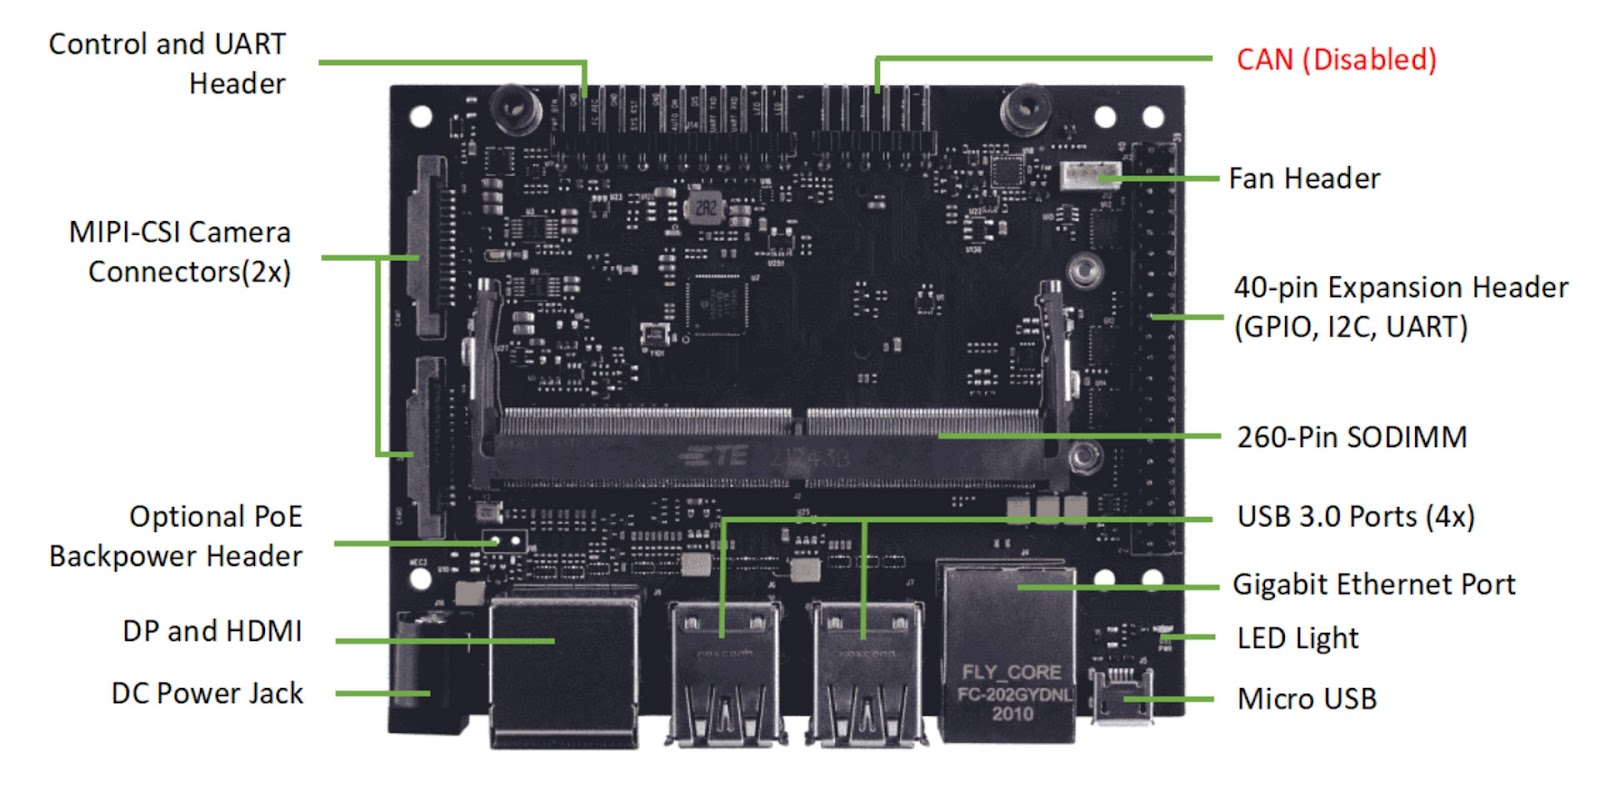
This custom carrier (model J1020) offers different extra connections compared to an official carrier board. For example, in the pictures below, you can notice:
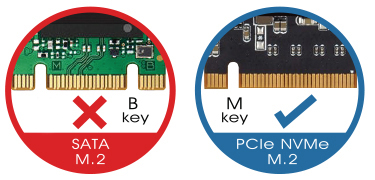
- M.2 KEY M
- M.2 KEY E (disabled)
- RTC socket (battery not included)
- Fan header (different connector)
- Optional PoE backpower header
- DC Barrel jack 9V-19V (The official DevKit needs only 5V input)

Compared to the official Developer Kit, this carrier reComputer J1020 uses an NVIDIA Jetson Nano module, which works with a 16Gb eMMC memory instead of an SDcard slot. Still, if you need extra space, you can use an M.2 KEY M and plug in an SSD NVMe card to have extra space.
ℹ️ INFO This NVIDIA Jetson has already installed the Jetpack 4.6. So you can use it directly when you power on the system.
Install on SD card
Here we are!
Suppose you want to install the latest NVIDIA Jetpack on the Jetson Nano. In that case, you can follow the guidelines suggested by Seeed Studio, Install NVIDIA System based on Seeed Carrier Board.
First stage you need to install on your Desktop the NVIDIA SDK Manager.
![]() WARNING The latest NVIDIA Jetpack for NVIDIA Jetson Nano need Ubuntu 16.04 or 18.04 or x86 system.
WARNING The latest NVIDIA Jetpack for NVIDIA Jetson Nano need Ubuntu 16.04 or 18.04 or x86 system.
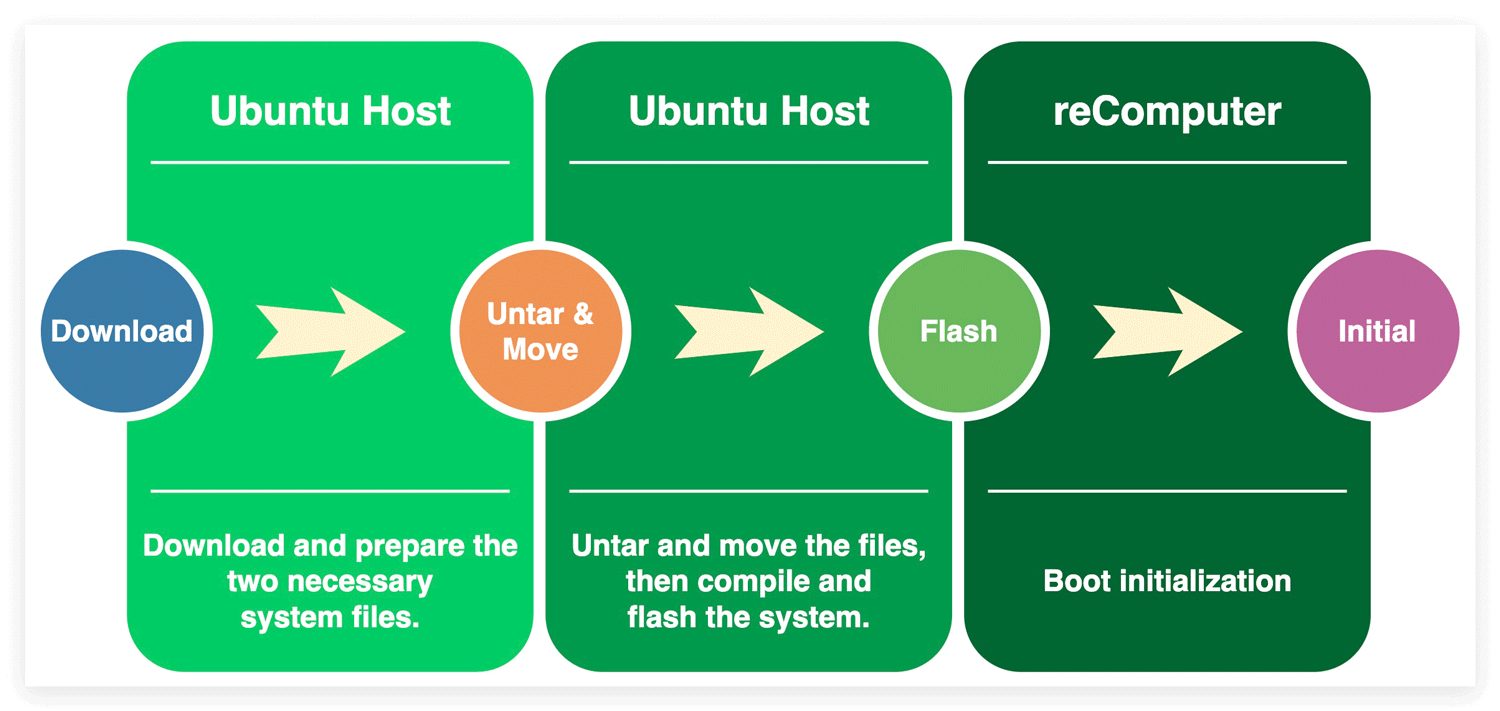
There are two way to install the NVIDIA Jetpack on NVIDIA Jetson Nano without SD card module:
- Use the SDK manager
- Assemble rootfs and flash jetson from script
For the first option, pretty simple and you can follow the SDK wizard, just remember to select the NVIDIA Jetson Nano module.

Below you can follow another way to build your NVIDIA Jetson Nano image starting from binaries and sample files.
Assemble rootfs
Open the command line of your host machine and write:
tar xf ${L4T_RELEASE_PACKAGE}
cd Linux_for_Tegra/rootfs/
sudo tar xpf ../../${SAMPLE_FS_PACKAGE}
cd ..
sudo ./apply_binaries.sh
where:
-
L4T_RELEASE_PACKAGEis the Linux for Tegra folder -
SAMPLE_FS_PACKAGEis the Tegra Linux sample root file system you downloaded from NVIDIA Jetpack website
Flash system on Jetson
Now you need only to flash the NVIDIA Jetson Nano with SSD following the command below:
sudo ./flash.sh ${BOARD} mmcblk0p1
where BOARD is the board connected. For more info, check this document.
![]() WARNING Remember to plug the carrier board in force recovery mode.
WARNING Remember to plug the carrier board in force recovery mode.
Example for the NVIDIA Jetson Nano devkit with emmc the command will be:
sudo ./flash.sh jetson-nano-devkit-emmc mmcblk0p1
After the script format and install the Jetpack, the NVIDIA jetson will be ready to use, but you need to update and upgrade all system.
Follow the installation guide using an HDMI monitor and after update and upgrade the system using the commands below:
sudo apt update
sudo apt full-upgrade
Format and Install SD card
ℹ️ INFO This Guide is part of the Seeed Studio documentation Expansion Via M.2 Slot On Carrier Board And SSD

You need an SSD NVMe, or you can use the 128GB NVMe M.2 PCle Gen3x4 SSD and plug it like the picture below. Remember to find and screw an M1 to hold the memory. Usually, this screw is not included when you buy an NVMe memory, and the Seeed Studio reComputer doesn’t include extra screws.
Restart your NVIDIA Jetson Nano and click the Ubuntu icon in the upper left corner to search for Disks a window appear, like the picture below:
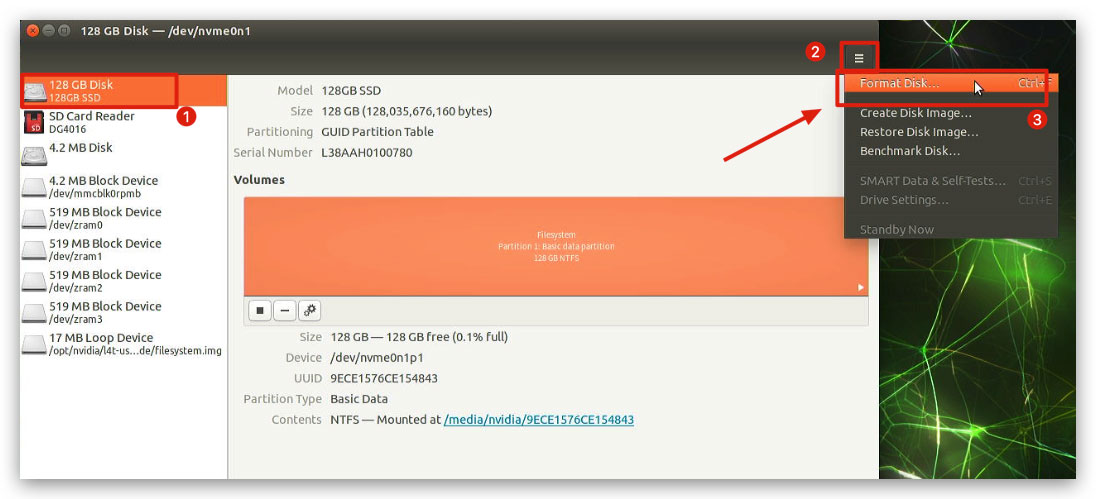
Now:
- select Format Disk
- Check is selected: “Compatible with modern systems and hard disks > 2TB (GPT)”
- Click on the middle + to add a disk character
- Create a new partition with max size as possible
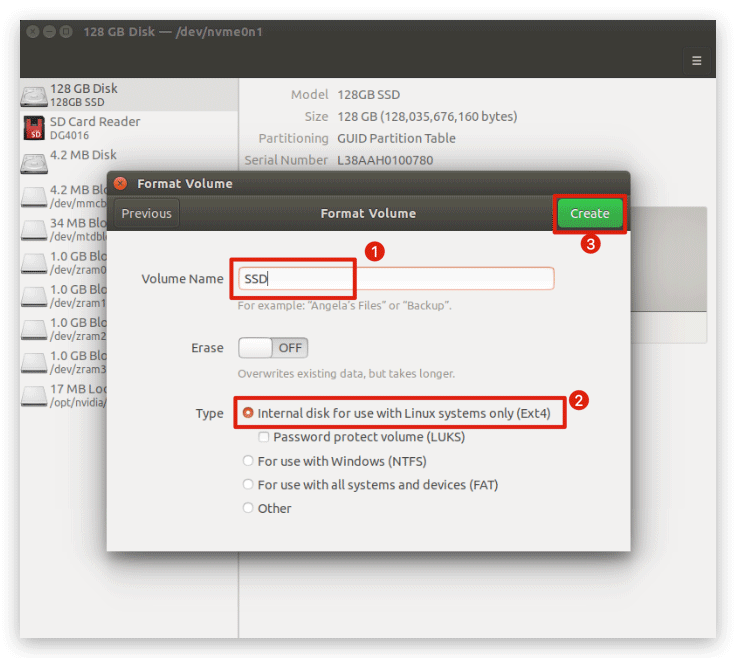
- Volume Name: SSD and select Internal disk for use with Linux systems only (Ext4)
After this stage, we can copy all MMC partition to the NVMe SSD card, open the NVIDIA Jetson Nano terminal and write:
git clone https://github.com/jetsonhacks/rootOnNVMe.git
cd rootOnNVMe/
Then execute:
./copy-rootfs-ssd.sh
and finally complete the installation running the last script:
./setup-service.sh
When you restart reComputer, you will see that the eMMC has become an external storage device on the main interface.
Reference
All reference you can find here: